

本文通过JavaScript、HTML5和CSS3技术,展示了一个自定义弹出窗口的完整实现方案。包含demo.jsp页面结构及myLayer.js核心逻辑,通过简单的按钮点击触发弹窗,适用于前端基础交互场景。
自定义弹出窗口效果实现
本文分享了一个使用JavaScript实现的自定义弹出窗口效果的具体代码示例,供读者参考学习。
以下是该效果的视觉呈现:
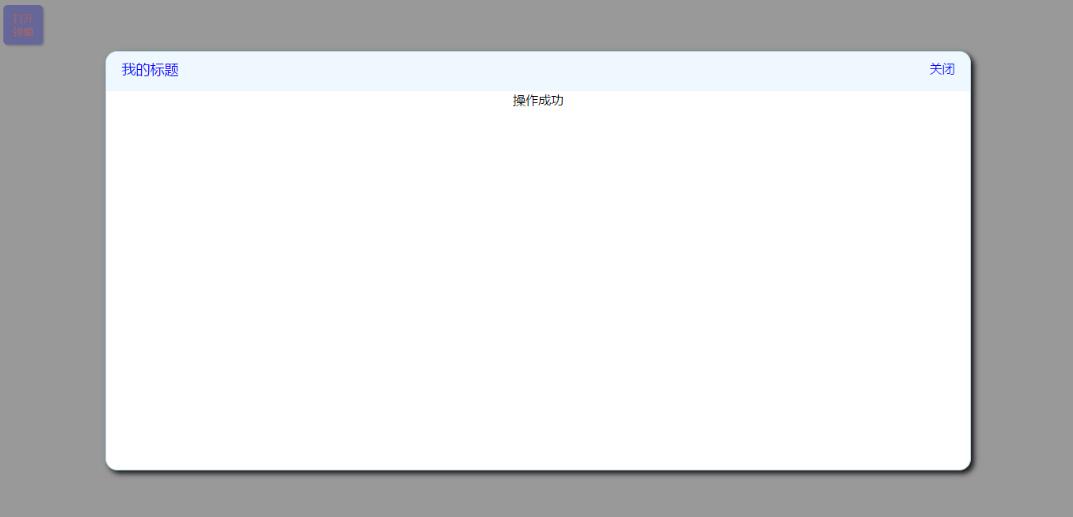
具体实现代码如下:
首先是页面文件demo.jsp,其核心结构如下:
页面结构demo.jsp
<%@ page contentType="text/html;charset=UTF-8" language="java" %>
<html>
<head>
  <title>自定义弹出窗口</title>
  <script type="text/javascript" src="js/myLayer.js"></script>
  <style type="text/css">
    button{
      width: 50px;
      height: 50px;
      border: 1px solid blue;
      background-color: blue;
      color: red;
      border-radius: 5px;
      -webkit-box-shadow: 2px 2px 2px gray;
      -moz-box-shadow: 2px 2px 2px gray ;
      box-shadow: 2px 2px 2px gray ;
    }
    button:hover{
      background-color: green;
      cursor: pointer;
    }
  </style>
  <script type="text/javascript">
    function openWindow() {
      new MyLayer({
        top:"10%",
        left:"10%",
        width:"80%",
        height:"80%",
        title:"我的标题",
        content:"操作成功"
      }).openLayer();
    }
  </script>
</head>
<body>
  <button type="button" onclick="openWindow()">打开弹窗</button>
</body>
</html>
其次是封装弹窗逻辑的JavaScript文件myLayer.js,主要代码逻辑如下:
核心逻辑myLayer.js
/**
 * Created by zhuwenqi on 2017/6/16.
 */
/**
 * @param options 弹窗基本配置信息
 * @constructor 构造方法
 */
function MyLayer(options) {
  this.options = options ;
}
/**
 * 打开弹窗
 */
MyLayer.prototype.openLayer = function () {
  var background_layer = document.createElement("div");
  background_layer.style.display = "none";
  background_layer.style.position = "absolute";
  background_layer.style.top = "0px";
  background_layer.style.left = "0px";
  background_layer.style.width = "100%";
  background_layer.style.height = "100%";
  background_layer.style.backgroundColor = "gray";
  background_layer.style.zIndex = "1001";
  background_layer.style.opacity = "0.8" ;
  var open_layer = document.createElement("div");
  open_layer.style.display = "none";
  open_layer.style.position = "absolute";
  open_layer.style.top = this.options.top === undefined ? "10%" : this.options.top;
  open_layer.style.left = this.options.left === undefined ? "10%" :this.options.left;
  open_layer.style.width = this.options.width === undefined ? "80%" : this.options.width;
  open_layer.style.height = this.options.height === undefined ? "80%" : this.options.height;
  open_layer.style.border = "1px solid lightblue";
  open_layer.style.borderRadius = "15px" ;
  open_layer.style.boxShadow = "4px 4px 10px #171414";
  open_layer.style.backgroundColor = "white";
  open_layer.style.zIndex = "1002";
  open_layer.style.overflow = "auto";
  var div_toolBar = document.createElement("div");
  div_toolBar.style.textAlign = "right";
  div_toolBar.style.paddingTop = "10px" ;
  div_toolBar.style.backgroundColor = "aliceblue";
  div_toolBar.style.height = "40px";
  var span_title = document.createElement("span");
  span_title.style.fontSize = "18px";
  span_title.style.color = "blue" ;
  span_title.style.float = "left";
  span_title.style.marginLeft = "20px";
  var span_title_content = document.createTextNode(this.options.title === undefined ? "" : this.options.title);
  span_title.appendChild(span_title_content);
  div_toolBar.appendChild(span_title);
  var span_close = document.createElement("span");
  span_close.style.fontSize = "16px";
  span_close.style.color = "blue" ;
  span_close.style.cursor = "pointer";
  span_close.style.marginRight = "20px";
  span_close.onclick = function () {
    open_layer.style.display = "none";
    background_layer.style.display = "none";
  };
  var span_close_content = document.createTextNode("关闭");
  span_close.appendChild(span_close_content);
  div_toolBar.appendChild(span_close);
  open_layer.appendChild(div_toolBar);
  var div_content = document.createElement("div");
  div_content.style.textAlign = "center";
  var content_area = document.createTextNode(this.options.content === undefined ? "" : this.options.content);
  div_content.appendChild(content_area);
  open_layer.appendChild(div_content);
  document.body.appendChild(open_layer);
  document.body.appendChild(background_layer);
  open_layer.style.display = "block" ;
  background_layer.style.display = "block";
};
以上即为本文的全部内容,希望能为读者的学习提供有益帮助,同时也欢迎大家继续支持本站。