

本文介绍如何使用原生JavaScript实现网页图片无缝滚动效果。通过掌握innerHTML、scrollLeft、offsetWidth等DOM属性,结合setInterval定时器与clearInterval清除机制,可无需依赖插件完成自动滚动功能。文章详细解析了关键API的作用及代码逻辑,帮助开发者理解位置计算与循环滚动的实现原理。
原生JS无缝滚动实现原理
在网页开发中,无缝滚动效果十分常见,许多方案依赖第三方插件,但实际上使用原生JavaScript实现这一功能更为简洁高效。
实现该效果的核心在于对JavaScript位置属性的准确运用。
- 1.innerHTML:用于设置或获取元素内部的HTML标签内容。
- 2.scrollLeft:用于设置或获取元素左边界与窗口当前可见内容最左端之间的距离。
- 3.offsetWidth:用于获取指定标签元素的宽度。
- 4.setInterval():用于设置方法定时启动执行。
- 5.clearInterval():用于清除已设置的定时器。
运行效果如图所示:
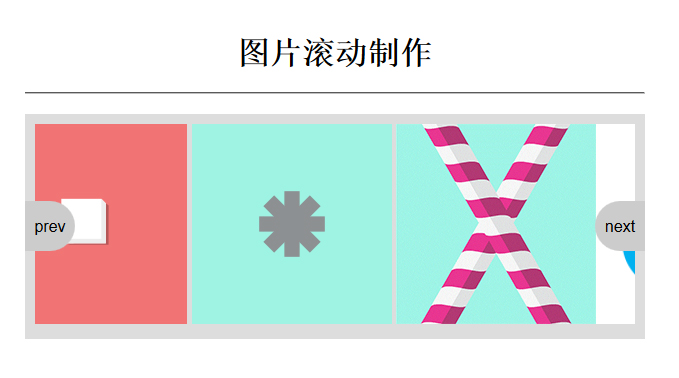
关键API与代码解析
<!DOCTYPE html>
<html lang="en">
<head>
  <meta charset="UTF-8">
  <title>javascript scroll制作</title>
</head>
<body>
<style>
  /*conment*/
  *{
  margin: 0;
  padding: 0;
 }
 img{max-width: 100%;}
 .container{
  max-width: 620px;
  margin: 0 auto;
  padding-top: 50px;
 }
 .text-center{text-align: center;}
 .list-inline li{
  display: inline-block;
 }
 .hide{display: none;}
 hr{
  margin:20px 0;
 }
 .tag{
  background-color: #ccc;
  padding: 5px 0;
 }
 .tag li{
  padding: 0 10px;
  border-left: 1px solid #fff;
  cursor:pointer;
 }
 .tag li:first-child{
  border-left: transparent;
 }
 .tag li.active{
  background-color: #ddd;
 }
 .scroll{
  position: relative;
  padding: 10px;
  margin-bottom: 20px;
  background-color: #ddd;
 }
 .wrap{
  overflow: hidden;
 }
 .content{
  min-width: 3000px;
  height: 200px;
 }
 .content ul{
  float: left;
 }
 .content ul li{
  display: inline-block;
  max-width: 200px;
 }
 #prev,#next{
  width: 50px;
  height: 50px;
  margin-top: -25px;
  background-color: #ccc;
  line-height: 50px;
  text-align: center;
  cursor: pointer;
 }
 #prev{
  position: absolute;
  left: 0;
  top:50%;
  border-radius: 0 25px 25px 0;
 }
 #next{
  position: absolute;
  right: 0;
  top:50%;
  border-radius: 25px 0 0 25px;
 }
</style>
  <div class="container">
    <h1 class="text-center">图片滚动制作</h1>
    <hr>
  <div class="scroll">
   <div class="wrap" id="wrap">
    <div id="content" class="content" >
     <ul id="list1">
      <li> <img src="freelance.gif" alt=""> </li>
      <li> <img src="button.gif" alt=""></li>
      <li> <img src="load.gif" alt=""></li>
      <li> <img src="straw.gif" alt=""></li>
     </ul>
     <ul id="list2">
     </ul>
    </div>
   </div>

   <div id="prev">
    prev
   </div>
   <div id="next">
    next
   </div>
  </div>
  </div>
<script>
 var wrap=document.getElementById('wrap');
 var list1=document.getElementById('list1');
 var list2=document.getElementById('list2');
 var prev=document.getElementById('prev');
 var next=document.getElementById('next');
 //创建复制一份内容列表
 list2.innerHTML=list1.innerHTML;
 //向左循环滚动
 function scroll(){
  if(wrap.scrollLeft>=list2.offsetWidth){
   wrap.scrollLeft=0;
  }
  else{
   wrap.scrollLeft++;
  }
 }
  timer = setInterval(scroll,1);
 //鼠标停留使用clearInterval()
 wrap.onmouseover=function(){
  clearInterval(timer);
 }
 wrap.onmouseout=function(){
  timer = setInterval(scroll,1);
 }
 //向左加速
 function scroll_l(){
  if(wrap.scrollLeft>=list2.offsetWidth){
   wrap.scrollLeft=0;
  }
  else{
   wrap.scrollLeft++;
  }
 }
 //向右滚动
 function scroll_r(){
  if(wrap.scrollLeft<=0){
   wrap.scrollLeft+=list2.offsetWidth;
  }
  else{
   wrap.scrollLeft--;
  }
 }
 prev.onclick=function(){
  clearInterval(timer);
  change(0)
 }
 next.onclick=function(){
  clearInterval(timer);
  change(1)
 }
 function change(r){
  if(r==0){
   timer = setInterval(scroll_l,60);
   wrap.onmouseout = function(){
    timer = setInterval(scroll_l,60);
   }
  }
  if(r==1){
   timer = setInterval(scroll_r,60);
   wrap.onmouseout = function(){
    timer = setInterval(scroll_r,60);
   }
  }
 }
</script>
</body>
</html>
以上即为分享的图片无缝滚动JS代码实现,希望对学习JavaScript程序设计有所帮助。