

本文详细解析如何使用JavaScript实现前端登录拼图验证功能。内容涵盖底图与验证区域的CSS布局、滑块与对号的HTML/CSS实现,以及通过监听鼠标按下、移动和抬起事件计算位移值。文章还探讨了pageX与offsetX的差异,并提供了验证通过后的回弹动画处理逻辑及完整示例代码。
参考相关技术文章,本文旨在复现并实现一个用于登录场景的拼图验证码功能。具体效果如示例图所示。

底图实现
首先构建一个容器元素,用于承载背景图片。

// html
        <div class="check">
        </div>
// css
.check {
width: 400px;
height: 300px;
background-image: url(./img/bg.avif);
background-size: 100% 100%;
background-repeat: no-repeat;
position: relative;
filter: brightness(80%);
}验证区域在底图中的显示通过CSS伪类完成。

    .check::before {
            position: absolute;
            content: '';
            width: 50px;
            height: 50px;
            background: rgba(0, 0, 0, 0.5);
            top: 100px;
            left: 280px;
    }
被验证区域块
被验证区域的实现类似于图像裁剪,即从底图中截取特定部分并调整其位置,使其在视觉上成为整体的一部分。核心思路是利用background-position属性设置负坐标值,从而获取图片的指定局部。
        <div class="check">
                <!-- 验证区块通过伪类实现 -->
                <!-- 被验证区块 -->
                <div class="check-box" id="check-box"></div>
        </div>
.check-box {
width: 50px;
height: 50px;
position: absolute;
top: 100px;
left: 0;
background-image: inherit;
background-repeat: inherit;
background-size: 400px 300px;
background-position: -280px -100px;
border: 1px solid #fff;
}滑块区域
滑块的HTML结构与CSS样式实现较为简单。其中,滑块内的对号图标通过设置属性中的border-width实现,这种设计方式颇具巧思。
<!-- 拖动条 -->
<div class="drag">
<!-- 滑块 -->
<div class="drag-box" id="drag-box">
<!-- 对号 -->
<div id="drag-mark" class="drag-mark"></div>
</div>
<!-- 文字提示 -->
<div class="drag-tips">
<span>按住左边按钮向右拖动完成上方图像验证</span>
</div>
</div> .drag {
width: 400px;
height: 50px;
background-color: #e3e3e3;
margin-top: 10px;
position: relative;
}
.drag-box {
position: absolute;
top: 0;
left: 0;
width: 50px;
height: 50px;
background-color: aquamarine;
z-index: 10;
display: flex;
justify-content: center;
align-items: center;
}
.drag-tips {
position: absolute;
top: 0;
left: 0;
display: flex;
justify-content: end;
align-items: center;
width: 95%;
height: 100%;
font-size: 12px;
color: #8a8a8a;
user-select: none;
}
.drag-mark {
width: 8px;
height: 16px;
border-color: #009933;
border-style: solid;
border-width: 0 3px 5px 0;
transform: rotate(45deg);
opacity: 0;
transition: 0.3s;
}动态滑动
滑动交互过程主要涉及鼠标按下、鼠标移动以及鼠标弹起三个阶段。
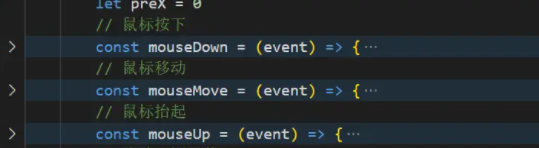
鼠标按下
在鼠标按下事件中,保存鼠标的初始水平坐标pageX,以便后续计算移动距离。
同时监听鼠标的移动事件。
// 鼠标按下
const mouseDown = (event) => {
// 获取鼠标坐标
preX = event.pageX
// 监听鼠标移动
document.addEventListener('mousemove', mouseMove)
}
···鼠标移动
- 在鼠标移动过程中,获取当前鼠标的pageX值,并与初始值相减,从而得到当前的移动偏移量。
- 在鼠标弹起时,移除对鼠标移动事件的监听。
- 根据计算出的移动值,同步更新滑块和被验证区域块的位置。
此处存在一个技术疑问:使用pageX或clientX均可实现预期效果,但使用offsetX时会出现画面闪烁。尽管网上有建议通过pointer-events: none解决该问题,但在本实现中并未生效。因此,关于鼠标移动值的精确计算方式仍存疑,待后续深入研究后更新。
// 鼠标移动
const mouseMove = (event) => {
const { pageX } = event
// 移动距离
const moveX = pageX - preX
// 移动不能超出区域
if (moveX < 0 || moveX > 350) {
return
}
check.style.transform = `translateX(${moveX}px)`
drag.style.transform = `translateX(${moveX}px)`
}鼠标抬起
- 在鼠标抬起事件中,获取当前pageX值并与初始值相减,得到最终的移动偏移量。
- 判断该移动偏移量是否落在预设的有效区间内。
- 若移动值在有效区间内,则调用验证通过的回调函数。
- 若移动值不在有效区间内,需为滑块和被验证区域块设计回弹动画效果。
// 鼠标抬起
const mouseUp = (event) => {
// 移出移动事件
document.removeEventListener('mousemove', mouseMove)
const { pageX } = event
const moveX = pageX - preX
if (moveX < 278 || moveX > 285) {
.......
} else {
success()
}
}有效验证
所谓有效验证,即触发验证通过的回调逻辑。
// 校验回调函数
const success = () => {
console.log('通过校验!')
}动画处理
回弹动画的处理分为CSS和JavaScript两部分。CSS方面定义动画效果,JavaScript方面则为滑块和被验证区域块赋值动画状态,并监听动画结束事件。当动画结束时,将滑块和被验证区域块重置为初始位置(0),并清除动画相关样式。
/* 回弹动画 */
@keyframes move {
to {
transform: translateX(0);
}
} if (moveX < 278 || moveX > 285) {
// 没有在校验区域 增加回弹动画
drag.style.animation = 'move 0.5s ease-in-out'
check.style.animation = 'move 0.5s ease-in-out'
// 动画结束回调
const animationEnd = () => {
check.style.transform = `translateX(${0}px)`
drag.style.transform = `translateX(${0}px)`
mark.style.opacity = 0
// 清除动画
drag.style.animation = ''
check.style.animation = ''
// 取消监听动画结束回调
document.removeEventListener('animationEnd', animationEnd)
}
document.addEventListener('animationend', animationEnd)
}完整代码
示例中使用的图片原本位于远程服务器,现已下载至本地。点击上方的底图链接即可获取原图。
<!--
* @Author: Kongjingjing
* @Date: 2023-01-10 15:37:03
* @Description:
-->
<!DOCTYPE html>
<html lang="en">
<head>
<meta charset="UTF-8" />
<meta http-equiv="X-UA-Compatible" content="IE=edge" />
<meta name="viewport" content="width=device-width, initial-scale=1.0" />
<title>Document</title>
<style>
.check {
width: 400px;
height: 300px;
background-image: url(./img/bg.avif);
background-size: 100% 100%;
background-repeat: no-repeat;
position: relative;
filter: brightness(80%);
}
.check::before {
position: absolute;
content: '';
width: 50px;
height: 50px;
background: rgba(0, 0, 0, 0.5);
top: 100px;
left: 280px;
}
        .check-box {
                width: 50px;
                height: 50px;
                position: absolute;
                top: 100px;
                left: 0;
                background-image: inherit;
                background-repeat: inherit;
                background-size: 400px 300px;
                background-position: -280px -100px;
                border: 1px solid #fff;
        }
.drag {
width: 400px;
height: 50px;
background-color: #e3e3e3;
margin-top: 10px;
position: relative;
}
.drag-box {
position: absolute;
top: 0;
left: 0;
width: 50px;
height: 50px;
background-color: aquamarine;
z-index: 10;
display: flex;
justify-content: center;
align-items: center;
}
.drag-tips {
position: absolute;
top: 0;
left: 0;
display: flex;
justify-content: end;
align-items: center;
width: 95%;
height: 100%;
font-size: 12px;
color: #8a8a8a;
user-select: none;
}
/* 回弹动画 */
@keyframes move {
to {
transform: translateX(0);
}
}
.drag-mark {
width: 8px;
height: 16px;
border-color: #009933;
border-style: solid;
border-width: 0 3px 5px 0;
transform: rotate(45deg);
opacity: 0;
transition: 0.3s;
}
</style>
</head>
<body>
<div class="check">
<!-- 验证区块通过伪类实现 -->
<!-- 被验证区块 -->
<div class="check-box" id="check-box"></div>
</div>
    <!-- 拖动条 -->
    <div class="drag">
            <!-- 滑块 -->
            <div class="drag-box" id="drag-box">
                    <!-- 对号 -->
                    <div id="drag-mark" class="drag-mark"></div>
            </div>
            <!-- 文字提示 -->
            <div class="drag-tips">
                    <span>按住左边按钮向右拖动完成上方图像验证</span>
            </div>
    </div>
</body>
<script>
// 被验证区块
const check = document.getElementById('check-box')
// 滑块
const drag = document.getElementById('drag-box')
// 对号
const mark = document.getElementById('drag-mark')
let preX = 0
// 鼠标按下
const mouseDown = (event) => {
// 获取鼠标坐标
preX = event.pageX
// 监听鼠标移动
document.addEventListener('mousemove', mouseMove)
}
    // 鼠标移动
    const mouseMove = (event) => {
            const { pageX } = event
            // 移动距离
            const moveX = pageX - preX
            // 移动不能超出区域
            if (moveX < 0 || moveX > 350) {
                    return
            }
            check.style.transform = `translateX(${moveX}px)`
            drag.style.transform = `translateX(${moveX}px)`
    }
// 鼠标抬起
const mouseUp = (event) => {
// 移出移动事件
document.removeEventListener('mousemove', mouseMove)
const { pageX } = event
const moveX = pageX - preX
if (moveX < 278 || moveX > 285) {
// 没有在校验区域 增加回弹动画
drag.style.animation = 'move 0.5s ease-in-out'
check.style.animation = 'move 0.5s ease-in-out'
// 动画结束回调
const animationEnd = () => {
check.style.transform = `translateX(${0}px)`
drag.style.transform = `translateX(${0}px)`
mark.style.opacity = 0
// 清除动画
drag.style.animation = ''
check.style.animation = ''
// 取消监听动画结束回调
document.removeEventListener('animationEnd', animationEnd)
}
document.addEventListener('animationend', animationEnd)
} else {
// 对号
mark.style.opacity = 1
success()
}
}
    // 校验回调函数
    const success = () => {
            console.log('通过校验!')
    }
// 滑块绑定鼠标按下事件
drag.addEventListener('mousedown', mouseDown)
document.addEventListener('mouseup', mouseUp)
</script>
</html>至此,关于JavaScript实现登录拼图验证的示例代码介绍完毕。如需了解更多相关内容,可搜索本站往期文章或继续浏览后续文章,感谢支持。