

本文通过对比面向过程与面向对象两种方式,详解如何使用JavaScript实现可复用的拖拽功能。重点讲解利用原型继承机制,在基础Drag类之上扩展DragLimit子类,从而在不修改原有代码的前提下,为拖拽元素添加边界限制逻辑,提升代码的可维护性与复用性。
本文通过具体案例,展示如何利用JavaScript面向对象编程技术实现拖拽交互功能,供开发者参考学习。
基础拖拽功能的面向对象实现
首先回顾传统的面向过程实现方式,其代码结构较为松散。
<!DOCTYPE html>
<html>
  <head>
    <meta charset="UTF-8">
    <style>
      #box {
        width: 100px;
        height: 100px;
        background: blue;
        position: absolute;
      }
    </style>
    <title>拖拽</title>
    <script>
      var oBox=null;
      var disX=0;
      var disY=0;

      window.onload=function(){
        oBox=document.getElementById('box');

        oBox.onmousedown=fnDown;
      };
      //鼠标按下事件
      function fnDown(ev){
        var oEvent = ev||event;
        disX = oEvent.clientX - oBox.offsetLeft;
        disY = oEvent.clientY - oBox.offsetTop;

        document.onmousemove = fnMove;
        document.onmouseup = fnUp;
      }
      //鼠标移动事件
      function fnMove(ev){
        var oEvent=ev||event;

        oBox.style.left = oEvent.clientX - disX + 'px';
        oBox.style.top = oEvent.clientY - disY + 'px';
      }
      //鼠标抬起事件
      function fnUp(){
        document.onmousemove = null;
        document.onmouseup = null;
      }
    </script>
  </head>

<body>
  <div id="box"></div>
</body>
</html>
随后展示基于面向对象思想重构后的代码结构,旨在提高代码的封装性与复用性。
核心逻辑封装在drag.js文件中。
/**
 * 拖拽
 * @param {Object} id div的id
 */
function Drag(id){
  this.oBox = document.getElementById(id);
  this.disX = 0;
  this.disY = 0;

  var _this = this;

  this.oBox.onmousedown = function(){
    _this.fnDown();
  }
}
//鼠标按下
Drag.prototype.fnDown = function(ev){
  var oEvent = ev || event;

  this.disX = oEvent.clientX - this.oBox.offsetLeft;
  this.disY = oEvent.clientY - this.oBox.offsetTop;

  var _this = this;

  document.onmousemove = function(){
    _this.fnMove();
  };
  document.onmouseup = function(){
    _this.fnUp();
  };
}
//鼠标移动
Drag.prototype.fnMove = function(ev){
  var oEvent= ev || event;

  this.oBox.style.left = oEvent.clientX - this.disX + 'px';
  this.oBox.style.top = oEvent.clientY - this.disY + 'px';
}
//鼠标抬起
Drag.prototype.fnUp = function(){
  document.onmousemove = null;
  document.onmouseup = null;
}
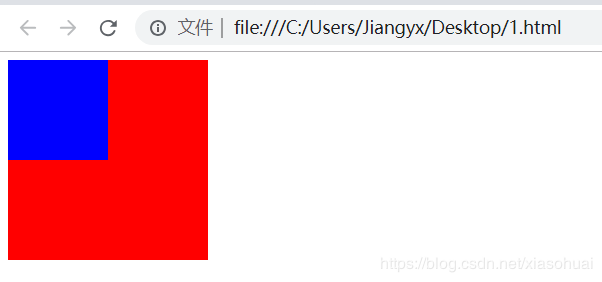
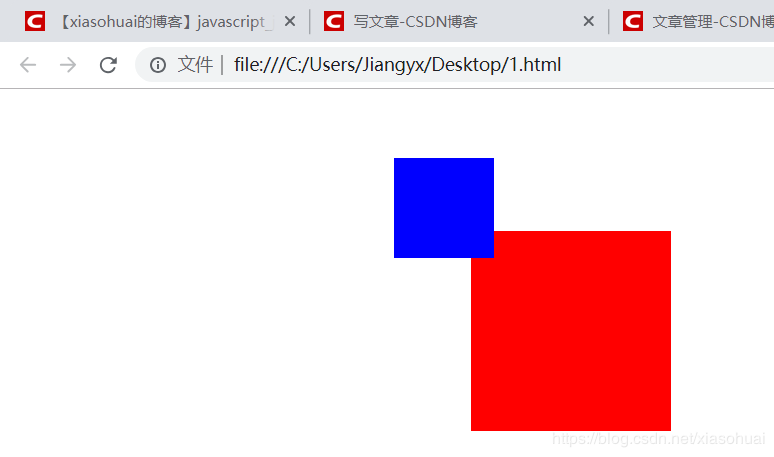
HTML页面drag.html负责调用上述JS模块,完成基础拖拽功能的集成。
<!DOCTYPE html>
<html>
  <head>
    <meta charset="UTF-8">
    <style>
      div {
        position: absolute;
      }
    </style>
    <title>拖拽</title>
    <script type="text/javascript" src="../js/drag.js" ></script>
    <script>
      window.onload = function(){
        var drag1 = new Drag("box1");

        var drag1 = new Drag("box2");
      };
    </script>
  </head>

<body>
  <div id="box1" style="background: red;width: 200px;height: 200px;"></div>
  <div id="box2" style="background: blue;width: 100px;height: 100px;"></div>
</body>
</html>
通过继承扩展边界限制功能
上述基础拖拽功能存在一个局限:未对拖拽边界进行限制。若希望保留父类Drag的通用功能,同时增加边界控制逻辑,可借鉴Java中的继承思想,通过创建子类来扩展特定行为。
对应的HTML结构如下。
<script type="text/javascript" src="../js/drag.js" ></script>
<script type="text/javascript" src="../js/dragLimit.js" ></script>
<script>
  window.onload = function(){
     var drag1 = new Drag("box1");
     var drag1 = new DragLimit("box2");//蓝色是不会超出边界的
  };
</script>
<body>
  <div id="box1" style="background: red;width: 200px;height: 200px;"></div>
  <div id="box2" style="background: blue;width: 100px;height: 300px;"></div>
</body>
DragLimit.js文件定义了DragLimit类,该类继承自Drag,专门用于处理拖拽时的边界限制逻辑。
/**
 * 限制边界的拖拽,继承自Drag
 * @param {Object} id
 */
function DragLimit(id){
  Drag.call(this, id);
}
//继承方法
for(var p in Drag.prototype){
  DragLimit.prototype[p] = Drag.prototype[p];
}
/**
 * 覆写父类的鼠标移动方法,控制不能移出边界
 */
DragLimit.prototype.fnMove = function(ev){
  var oEvent= ev || event;

  var left = oEvent.clientX - this.disX;
  var top = oEvent.clientY - this.disY;

  //控制边界
  if(left < 0){
    left = 0;
  } else if(left > document.documentElement.clientWidth-this.oBox.offsetWidth){
    left = document.documentElement.clientWidth-this.oBox.offsetWidth;
  }
  if(top <= 0){
    top = 0;
  } else if(top > document.documentElement.clientHeight-this.oBox.offsetHeight){
    top = document.documentElement.clientHeight-this.oBox.offsetHeight;
  }

  this.oBox.style.left = left + 'px';
  this.oBox.style.top = top + 'px';
}
读者可通过在线HTML/CSS/JavaScript代码运行工具:http://tools.jb51.net/code/HtmlJsRun,直接测试上述代码的实际运行效果。
如需深入了解JavaScript相关技术,建议参考本站专题:《javascript面向对象入门教程》、《JavaScript错误与调试技巧总结》、《JavaScript数据结构与算法技巧总结》、《JavaScript遍历算法与技巧总结》及《JavaScript数学运算用法总结》。
希望本文提供的实现思路与代码示例,能对读者的JavaScript程序设计工作有所帮助。