

本文详解在Vue项目中如何基于axios封装全局HTTP请求方法。通过定义install方法,将封装好的http模块注册为Vue插件,从而在组件中直接使用this.$get、this.$post、this.$put、this.$del及this.$fetch进行数据交互,并支持配置超时与拦截器。
Vue插件install方法规范
参考Vue官方文档的相关说明

Vue.js的插件机制要求插件必须暴露一个install方法。该方法接收两个参数:第一个是Vue构造器,第二个是可选的选项对象。
使用前需确保已安装axios依赖,执行命令如下:
axios依赖安装
npm install axios -S
具体实现案例如下所示:
http请求插件封装实现
//  基于axios 封装的http请求插件
const axios = require('axios');

/**
 * 以下这种方式需要调用Vue.use方法 调用的时候调用 this.$fetch, this.$post, this.$axios, this.$put, this.$del 方法
 */
function coverFormData (data) {
  return Object.keys(data).map(key => {
    let value = data[key];
    if (typeof value === 'object') {
      value = JSON.stringify(value);
    }
    return encodeURIComponent(key) + '=' + encodeURIComponent(value);
  })
}
const http = {
  install(Vue, Option) {
    axios.defaults.headers['Content-Type'] = 'application/x-www-form-urlencoded;charset=utf-8';
    if (Option) {
      // 超时设置
      axios.defaults.timeout = Option.timeout || 10000;
      // 默认请求地址设置
      axios.defaults.baseURL = Option.baseURL || "";
      // 头部设置
      if (Option.headers && typeof Option.headers === 'object') {
        for (let key in Option.headers) {
          if (!Option.headers.hasOwnProperty(key)) continue;
          axios.defaults.headers[key] = Option.headers[key];
        }
      }
      // 请求/响应拦截器
      Option.inRequest && axios.interceptors.request.use(Option.inRequest, error => {
          Promise.reject(error);
      });
      Option.inResponse && axios.interceptors.response.use(Option.inResponse, error => {
          Promise.reject(error);
      });
    }
    /**
     * @param  {string} url
     * @param  {object} params={}  参数可以根据需要自行处理
     */
    const fetch = (url, params = {}, config = {}) => {
      const str = coverFormData(params).join('&');
      return new Promise((resolve, reject) => {
        let address = url;
        if (str) {
          address += '?' + str;
        }
        axios.get(address, config).then(res => {
          resolve(res.data);
        }).catch(error => {
          reject(error);
        });
      });
    };

    /**
     * @param  {string} url
     * @param  {object} data={} 参数可以根据需要自行处理

     */
    const post = (url, data = {}, config = {}) => {
      let str = coverFormData(data).join('&');
      if (config.headers && config.headers['Content-Type'] && config.headers['Content-Type'].indexOf('application/json') > -1) {
        str = JSON.parse(JSON.stringify(data));
      }
      return new Promise((resolve, reject) => {
        axios.post(url, str, config).then(res => {
          resolve(res.data);
        }).catch(error => {
          reject(error);
        });
      });
    };

    /**
     * @param  {string} url
     * @param  {object} data={} 参数可以根据需要自行处理
     */
    const put = (url, data = {}, config = {}) => {
      const str = coverFormData(data).join('&');
      return new Promise((resolve, reject) => {
        axios.put(url, str, config).then(res => {
          resolve(res.data);
        }).catch(error => {
          reject(error);
        });
      });
    };

    /**
     * @param  {string} url
     * @param  {object} params={}
     */

    const del = (url, config = {}) => {
      const str = coverFormData(config).join('&');
      return new Promise((resolve, reject) => {
        axios.delete(url, str).then(res => {
          resolve(res.data);
        }).catch(error => {
          reject(error);
        });
      });
    };
    const data = { axios, fetch, post, put, del };
    // 这个地方说明了为啥使用的时候是this.$fetch, this.$post, this.$axios, this.$put, this.$del 这几个方式
    Object.keys(data).map(item => Object.defineProperty(Vue.prototype, '$' + item, { value: data[item] }));
  }
};

export default http;
接着在main.js文件中引入该模块并调用Vue.use进行注册:
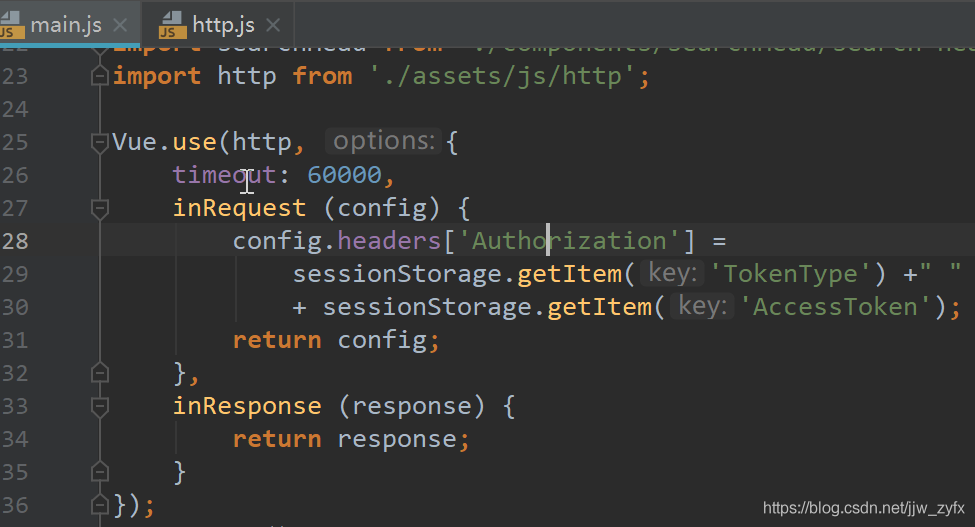
main.js中的插件注册
import http from './assets/js/http';

Vue.use(http, {
    timeout: 60000,
    inRequest (config) {
        config.headers['Authorization'] =
            sessionStorage.getItem('TokenType') +" "
            + sessionStorage.getItem('AccessToken');
        return config;
    },
    inResponse (response) {
        return response;
    }
});
完成上述步骤后,在子组件中即可直接通过this.$post等方式发起请求。
示例代码如下:
组件内POST请求调用示例
this.$post("你的url", {
        CityId: cityid,
        Type: 3
      })
        .then(res => {
          if (res.Success) {
            this.searchSecondary = res.Data;
          }
        })
        .catch(error => {
          console.log(error);
        });
需要注意的是,若需使用GET请求,应替换为this.$fetch方法,示例如下:
组件内FETCH请求调用示例
this.$fetch("你的url", {

    })
      .then(res => {
        console.log(res)
      })
      .catch(error => {
        console.log(error);
      });
以上就是关于Vue项目中封装this.$get、this.$post等$前缀方法的详细案例,更多相关内容请查阅本站过往文章或继续关注后续更新,感谢支持。