

本文深入解析Vue全局事件总线($bus)的实现原理,通过在main.js中将Vue实例挂载至原型,使所有组件共享同一实例。结合Company与Employee组件代码,演示如何利用$emit和$on方法实现跨层级及兄弟组件间的数据传递与事件监听,并提供完整的生命周期管理建议。
全局事件总线是Vue中一种通用的组件间通信机制,能够适用于任意层级和类型的组件之间的数据交互。
接下来通过具体的代码示例来展示其应用方式。
本例涉及的父组件为App。
<template>
    <div class="app">
        <Company/>
        <Employee/>
    </div>
</template>

<script>
import Company from "./components/Company.vue";
import Employee from "./components/Employee.vue";

export default {
    components:{
        Company,
        Employee
    }
}
</script>

<style>
.app{
    background: gray;
    padding: 5px;
}
.btn{
    margin-left:10px;
    line-height: 30px;
    background: ivory;
    border-radius: 5px;
}
</style>
涉及的子组件包括Company和Employee。
<template>
  <div class="company">
      <h2>公司名称:{{name}}</h2>
      <h2>公司地址:{{address}}</h2>
      <button @click="sendMessage">点我发送</button>
  </div>
</template>

<script>
export default {
    name:"Company",
    data(){
        return {
            name:"五哈技术有限公司",
            address:"上海宝山"
        }
    },
    methods:{
        sendMessage(){
            console.log("Company组件发送数据:",this.name);
            this.$bus.$emit("demo",this.name);
        }
    }

}
</script>

<style scoped>
.company{
    background: orange;
    background-clip: content-box;
    padding: 10px;
}
</style>
<template>
  <div class="employee">
      <h2>员工姓名:{{name}}</h2>
      <h2>员工年龄:{{age}}</h2>
  </div>
</template>

<script>
export default {
    name:"Employee",
    data(){
        return {
            name:"张三",
            age:25
        }
    },
    mounted(){
        this.$bus.$on("demo",(data) => {
            console.log("Employee组件监听demo,接收数据:",data);
        })
    },
    beforeDestroy() {
        this.$bus.$off("demo");
    }
}

</script>

<style scoped>
.employee{
    background: skyblue;
    background-clip: content-box;
    padding: 10px;
}
</style>
应用的入口文件为main.js。
import Vue from 'vue';
import App from './App.vue';

Vue.config.productionTip = false;

new Vue({
  el:"#app",
  render: h => h(App),
  beforeCreate(){
    Vue.prototype.$bus = this;
  }
})
在父组件App中,集成了子组件Company和Employee。
子组件Company与Employee之间的数据交互依赖于全局数据总线完成。
在main.js文件中,通过特定配置定义了全局事件总线:$bus。
由于$bus被定义在Vue.prototype上,因此$bus对所有组件实例可见,这意味着所有组件均可通过this.$bus来访问该总线。
此时,$bus被赋值为this,即当前的Vue实例,因此$bus继承了该实例的所有属性和方法,例如$emit、$on以及$off等。
new Vue({
  beforeCreate(){
    Vue.prototype.$bus = this;
  }
})
以下是全局事件总线的具体使用流程。
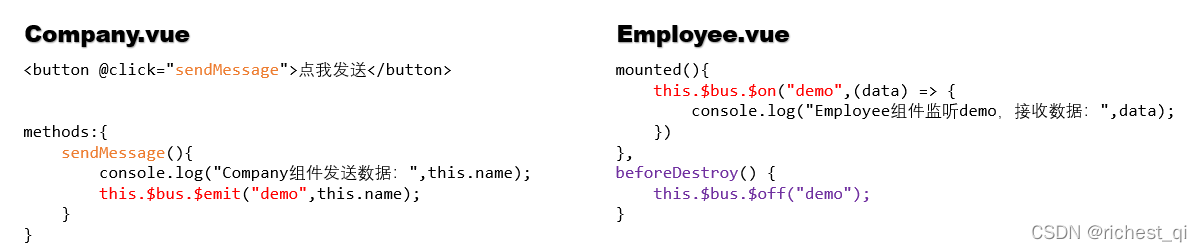
首先进行事件监听,即$bus.$on。在Employee组件中定义了针对demo事件的监听逻辑;
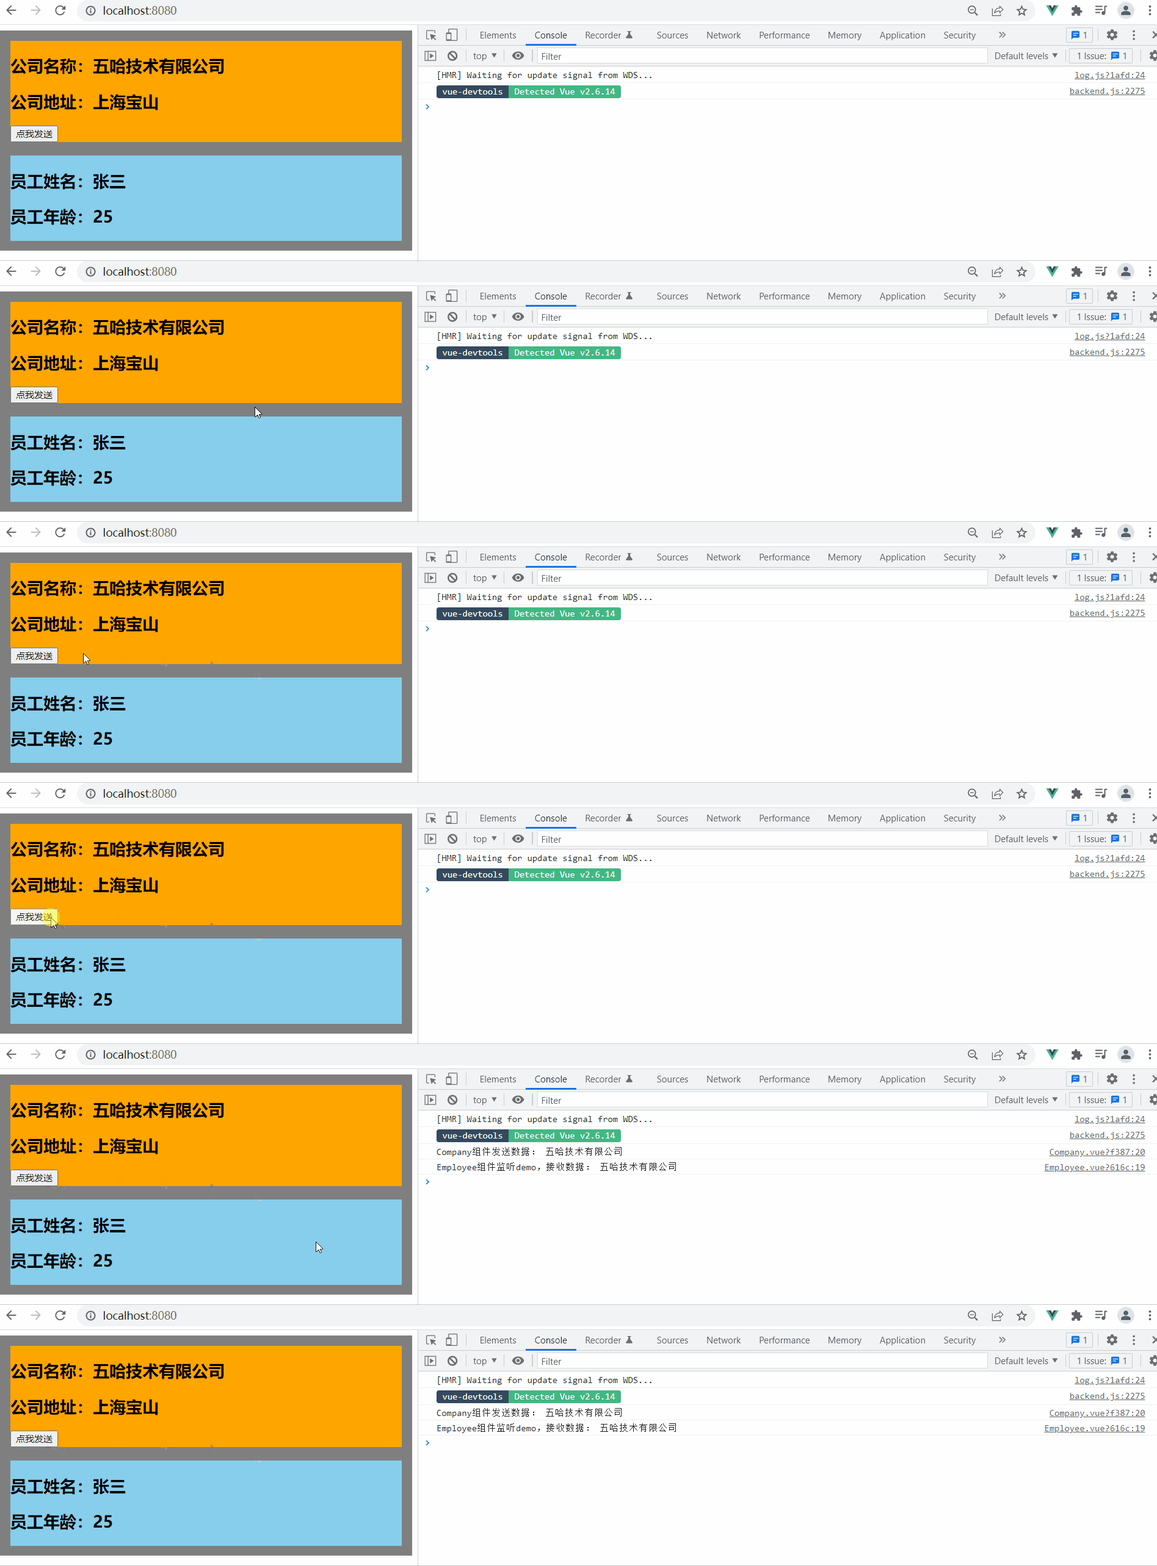
其次进行事件触发,即$bus.$emit。在Company组件中定义了触发逻辑,当点击按钮执行sendMessage回调函数时,该函数会触发demo事件。
总结
本文到此结束,希望能为您带来帮助,也欢迎您关注本站以获取更多精彩内容!