

本文介绍如何通过自定义Webpack Loader结合Babel AST解析,统计项目中第三方组件库的使用频率。通过过滤ImportDeclaration节点,提取包名与组件标识,实现自动化统计,为组件库优化提供数据支持。
背景
近期接到搭建组件库的任务,为了明确现有项目中各类三方组件库的使用热度,需要统计高频使用的组件。由于时间紧迫,决定自行开发工具来完成这一需求,思路是利用Webpack的构建能力来实现统计功能。
效果
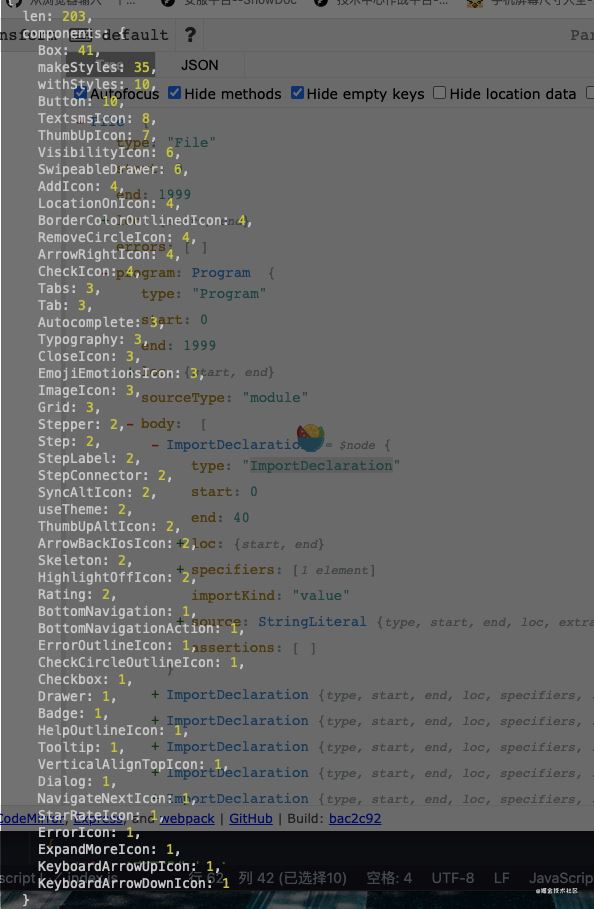
以@material-ui为例,以下是通过该方案统计得到的组件使用情况概览。
实现
Loader接收到的source参数为文件的静态字符串内容,这是处理的基础数据。
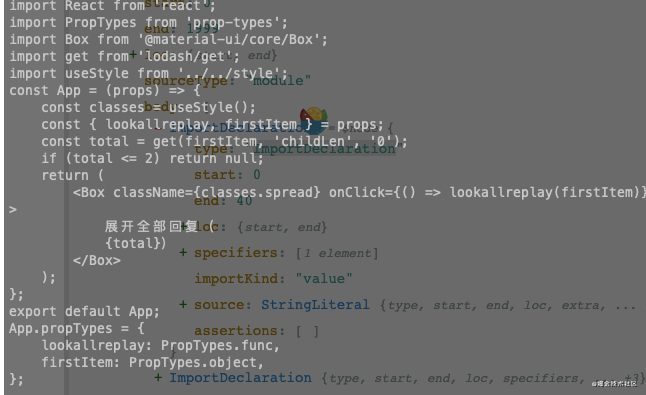
虽然可以直接通过正则表达式进行字符串匹配统计,但这种方式无法排除注释中的干扰,导致结果不准确。因此,采用AST(抽象语法树)解析方案更为可靠。关于AST的基本概念已有大量资料阐述,此处不再赘述。
分析 AST
本文使用@babel/parser进行代码解析,首先观察示例代码在AST中的结构表现。
import { Box } from '@material-ui/core';
import Autocomplete from '@material-ui/lab/Autocomplete';
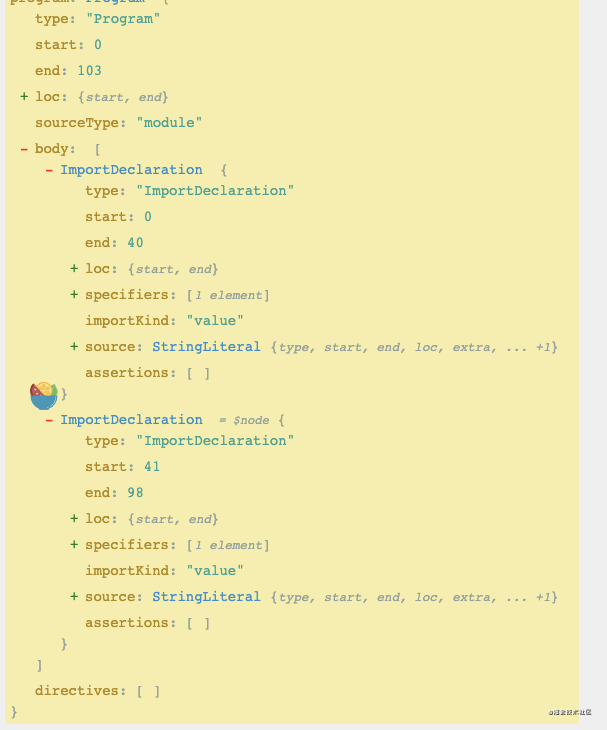
从结构可以看出,路径为program.body,节点类型为ImportDeclaration。进一步分析其内部结构如下。
"source": {
     "type": "StringLiteral",
     "value": "@material-ui/core"
 },
 // 第二段
 "source": {
      type": "StringLiteral",
     "value": "@material-ui/lab/Autocomplete"
 },
观察发现,source字段中的value包含了我们需要的包名信息,因此第一步操作即为此。
const ast = parser.parse(source, {
      sourceType: 'module',
      plugins: ['jsx'],
 });
const getImport = 'ImportDeclaration';
const getMaterialImport = packageName || '@material-ui';
const importAst = ast.program.body.filter(
  // type 节点类型,这里我们去过滤 import 声明类型 同时去过滤
  (i) => i.type === getImport && i.source.value.includes(getMaterialImport),
);
获取到相关的AST数组后,下一步是提取具体的组件名称。通过观察发现,specifiers字段中包含imported和local两个关键字段,它们均存储了组件名信息。
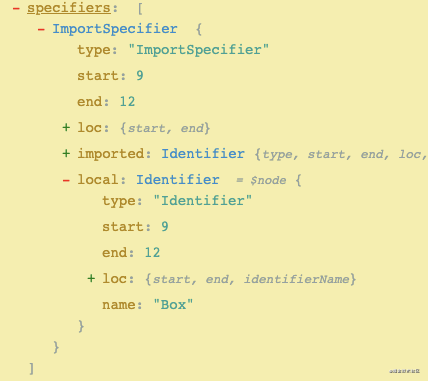
- imported字段表示从导出模块中导出的变量名。
- local字段表示在当前模块中导入后的变量名。
此处选择提取local字段,因为在使用默认导入等特定语法时,imported字段可能不存在。
import Autocomplete from '@material-ui/lab/Autocomplete';
此时包名与组件名均已获取,后续逻辑较为简单,直接展示完整代码实现。
demo
const parser = require('@babel/parser');
const loaderUtils = require('loader-utils');
const total = {
  len: 0,
  components: {},
};
// 对象排序
const sortable = (obj) => Object.fromEntries(Object.entries(obj).sort(([, a], [, b]) => b - a));
module.exports = function(source) {
  console.log(source, '--');
  const options = loaderUtils.getOptions(this);
  const { packageName = '' } = options;
  const callback = this.async();
  if (!packageName) return callback(null, source);
  try {
    // 解析成 ast
    const ast = parser.parse(source, {
      sourceType: 'module',
      plugins: ['jsx'],
    });
    if (ast) {
      setTimeout(() => {
        const getImport = 'ImportDeclaration';
        const getMaterialImport = packageName;
        const importAst = ast.program.body.filter(
          // type 节点类型,这里我们去过滤 import 声明类型 同时去过滤
          (i) => i.type === getImport && i.source.value.includes(getMaterialImport),
        );
        total.len = total.len + importAst.length;
        for (let i of importAst) {
          const { specifiers = [] } = i;
          for (let s of specifiers) {
            if (s.local) {
              const { name } = s.local;
              total.components[name] = total.components[name] ? total.components[name] + 1 : 1;
            }
          }
        }
        total.components = sortable(total.components);
        console.log(total, 'total');
        callback(null, source);
      }, 0);
    } else callback(null, source);
  } catch (error) {
    callback(null, source);
  }
};
配置调用Loader。
 {
  test: /\.(jsx|)$/,
  exclude: /node_modules/,
  include: [appConfig.eslintEntry],
  use: [
    {
      loader: path.resolve(__dirname, './loader/total.js'),
      options: {
        packageName: '@material-ui',
      },
    },
  ],
},
至此,一个简单的组件统计功能即告完成。当然,可能存在更优的实现方案,本文仅提供一种思路,欢迎交流讨论。
最后
实施该统计的意义在于,组件库上线后,可按周等时间维度统计各组件的引用次数。基于这些数据,可以分析组件库下一版本的优化方向,同时也为KPI汇报提供了客观的数据支撑。
关于利用50行代码实现Webpack组件使用次数统计的介绍到此结束,更多相关内容可搜索往期文章或继续浏览后续内容,感谢支持。