

本文介绍如何利用 three.js 的 BufferGeometry 和类型化数组构建粒子系统,实现图片的马赛克化效果。通过解析 Canvas 像素数据,提取特定间隔的颜色值并映射到几何体顶点颜色属性,完成视觉处理。同时简述了基于相邻像素颜色插值实现图片清晰化的反向原理。
BufferGeometry 与粒子系统概述
本文将探讨 BufferGeometry、类型化数组以及粒子系统的结合使用,展示如何使图片呈现马赛克效果。该原理同样适用于将模糊图片还原清晰,具体效果如图所示。
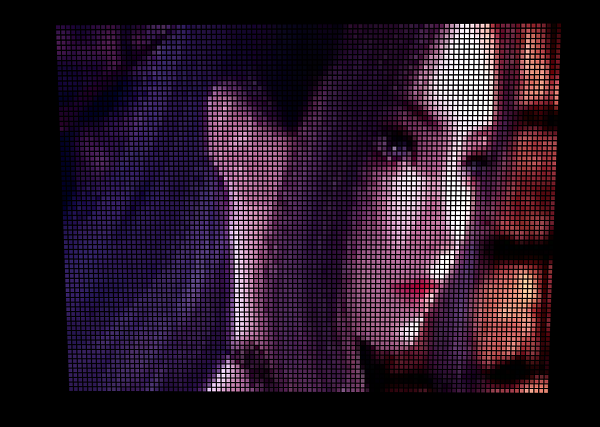
图片解析流程
1. 解析图片
图片解析步骤与之前的示例保持一致。
initCanvas() {
  canvas = document.createElement('canvas');
  content = canvas.getContext('2d');
  canvas.width = 1600;
  canvas.height = 1200;
  img = new Image();
  img.crossOrigin = '*';
  img.src = "/static/images/base/girl.jpg";
  img.onload = () => {
    content.drawImage(img, 0, 0, canvas.width, canvas.height);
    imgDate = content.getImageData(0, 0, canvas.width, canvas.height);
    this.createPotCloud();  //创建点云
  };
}
像素点操作与颜色映射
2. 操作像素点
createPotCloud() {
  if (points) {
    scene.remove(points)
  }
  let cw = Math.floor(canvas.width / size);
  let ch = Math.floor(canvas.height / size);
  particles = cw * ch;
  geometry = new THREE.BufferGeometry();
  positions = new Float32Array(Math.floor(particles * 3));
  positions_af = new Float32Array(Math.floor(particles * 3));
  var colors = new Float32Array(Math.floor(particles * 3));
  for (var i = 0; i < positions.length; i += 1) {

    positions[3 * i] = - canvas.width / 2 + (i % cw) * size;
    positions[3 * i + 1] = canvas.height / 2 + Math.floor((-1 - i) / cw) * size;
    positions[3 * i + 2] = 0;

    let selectPos = size * (i % cw) + Math.floor(i / cw) * cw * size * size;
    colors[3 * i] = imgDate.data[4 * selectPos] / 255.0;
    colors[3 * i + 1] = imgDate.data[4 * selectPos + 1] / 255.0;
    colors[3 * i + 2] = imgDate.data[4 * selectPos + 2] / 255.0;
  }
  geometry.setAttribute('position', new THREE.BufferAttribute(positions, 3));
  geometry.setAttribute('color', new THREE.BufferAttribute(colors, 3))
  geometry.dynamic = true;
  geometry.attributes.position.needsUpdate = true;
  var material = new THREE.PointsMaterial({ size: size, vertexColors: THREE.VertexColors })
  points = new THREE.Points(geometry, material);
  points.name = 'points';
  scene.add(points);
  loaded = true;
},
无需过度关注代码细节,核心逻辑在于每隔一定数量的颜色点提取一个代表色,并将该颜色赋值给 geometry 的 color 属性。虽然可以每隔两行或两列取点,但由于图片数据在内存中是一维排列的,因此需要借助数学计算来确定坐标。
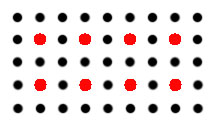
马赛克与清晰化原理
原理如示意图所示,较为直观。若要将不清晰的图片变得清晰,则需要插入更多的像素点。新插入像素点的颜色需基于已存在的像素点进行插值计算。例如,若原图像素点1的颜色为 0xffffff,像素点2的颜色为 0xdddddd,则位于两者之间的插入像素点颜色可计算为 0xeeeeee,依此类推。
以上即为 three.js 实现图片马赛克化的示例代码详解,更多关于该主题的参考资料请查阅本站其他相关文章。