

本文介绍在 React Native 中使用官方 FlatList 组件实现下拉刷新和上拉加载的完整方案。通过计算屏幕高度与列表项高度确定分页逻辑,利用 RefreshControl 处理刷新状态,并解决初始化时 onEndReached 误触发的问题,提供流畅且可维护的列表交互体验。
React Native FlatList 下拉刷新与上拉加载实现方案
React Native 的上拉加载功能曾让许多开发者感到困扰,以往多依赖第三方组件,但这类组件往往可维护性较差且使用体验不佳。近期在闲暇时间深入研究了官方提供的 FlatList 组件,最终实现的列表效果不仅流畅度显著提升,而且代码结构更加清晰易用。
官方文档参考地址:https://reactnative.cn/docs/flatlist/
以下是实际运行效果的展示:
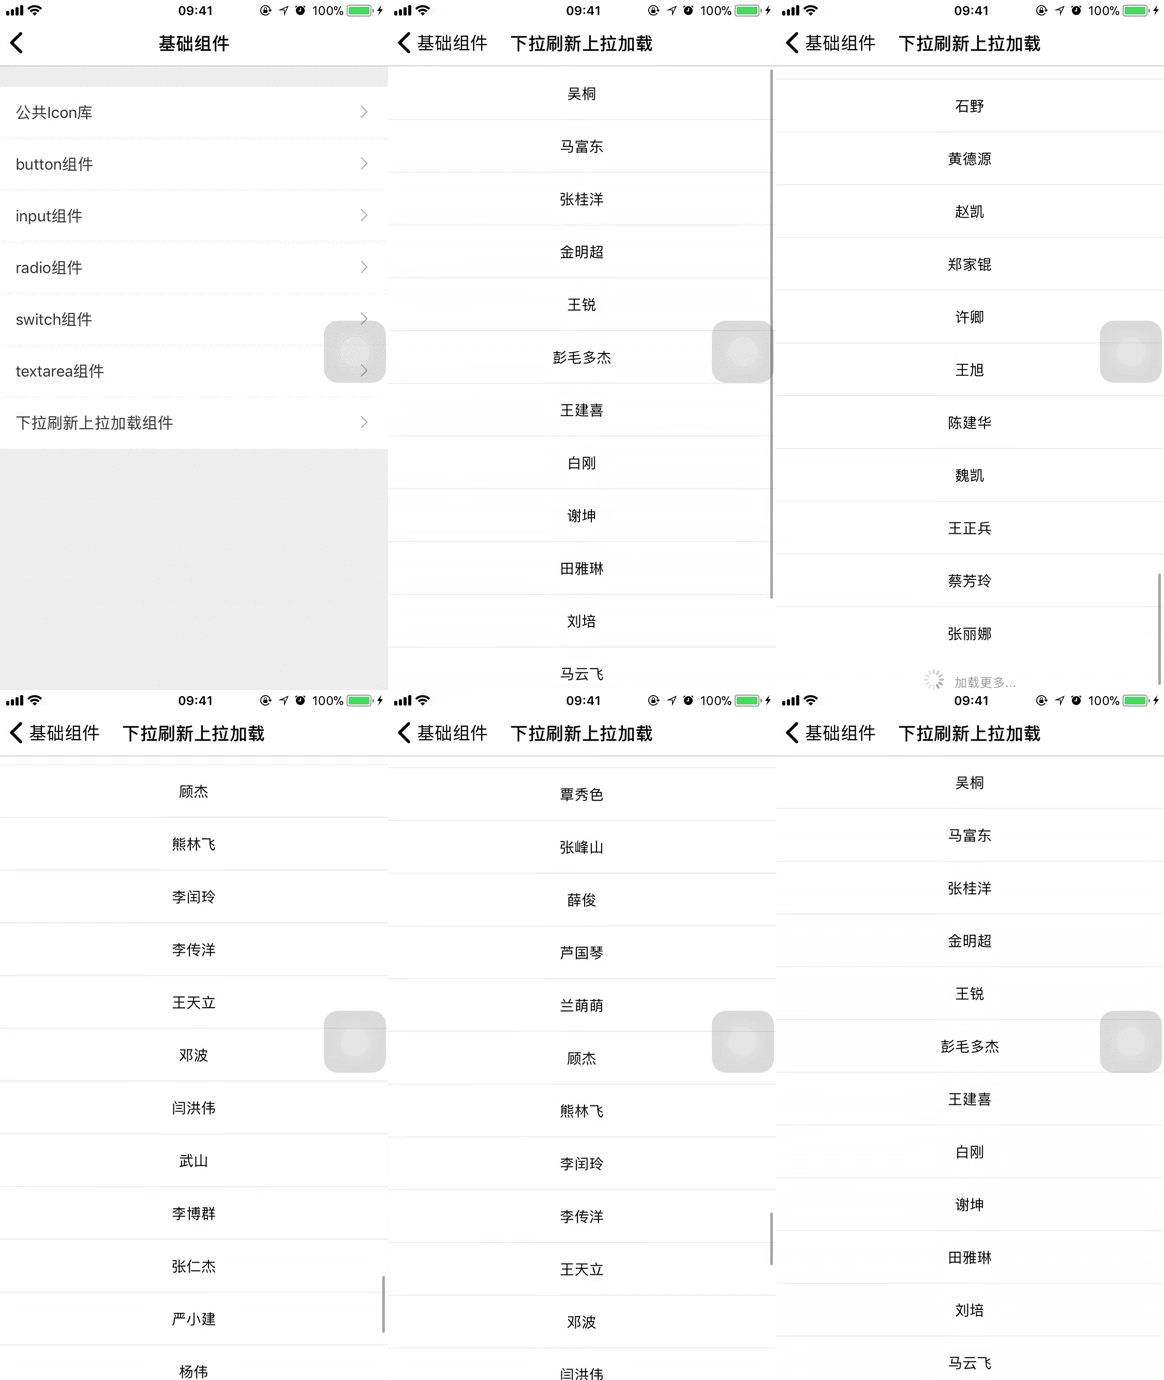
iOS 平台运行效果截图
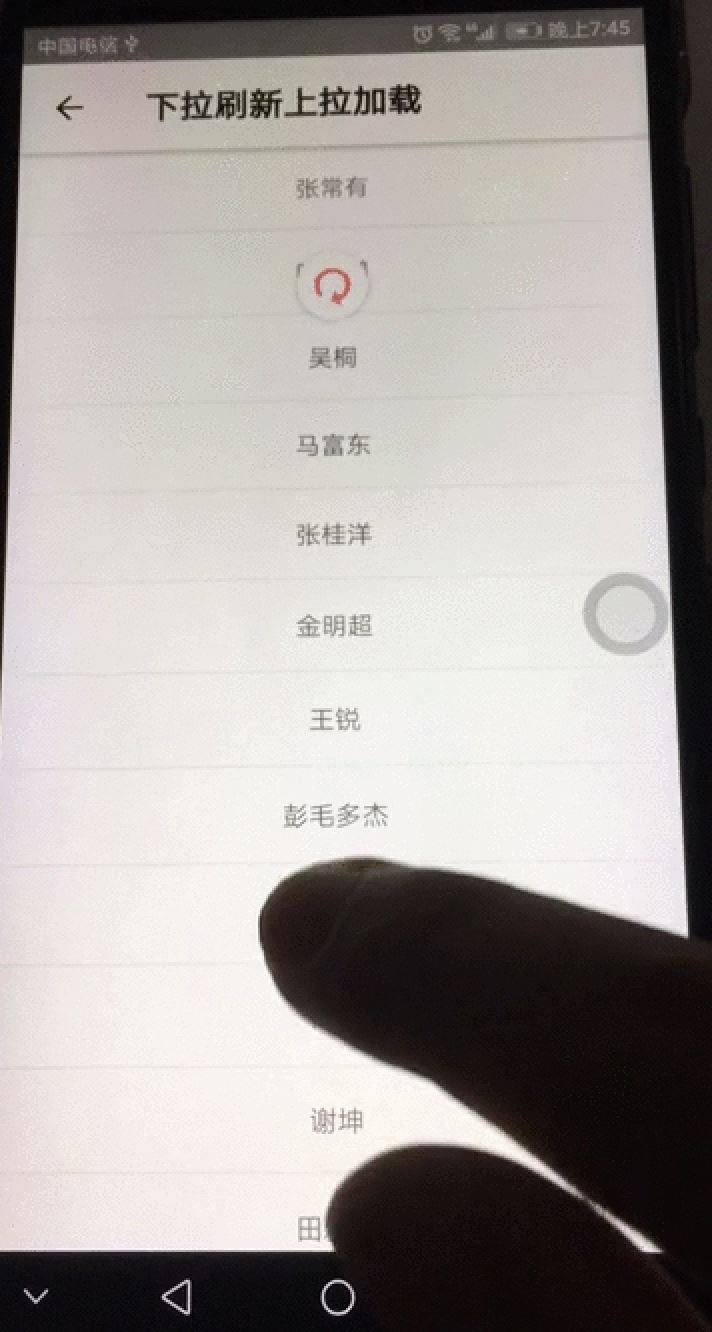
Android 平台运行效果截图
核心实现思路
核心实现思路在于精确计算屏幕高度,扣除导航栏头部占用空间后,根据列表项高度推算出每页显示的条目数量,并对结果向上取整。这一做法的主要目的是确保在列表内容未填满屏幕时,不会误触发 onEndReached 回调函数。
具体方法实现如下:
分页计算与代码实现
 //满屏页面判断
 fullScreenJusting(ItemHeight) {
  const screnHeight = screnInfo.size.height;   //屏幕高度
  //计算列表个数
  const listNum = (screnHeight - 40) / ItemHeight;
  return Math.ceil(listNum);
 }
下拉刷新功能采用 React Native 内置的 RefreshControl 组件实现。
该组件的官方文档地址:https://reactnative.cn/docs/refreshcontrol/#progressbackgroundcolor
相关的具体代码实现如下所示:
完整组件代码示例
import React, { Component } from 'react';
import {
 View,
 Text,
 Image,
 StyleSheet,
 FlatList,
 RefreshControl,
 ActivityIndicator,
} from 'react-native';
import { SafeAreaView } from 'react-navigation';
import screnInfo from '../utils/View';
import BaseStyle from '../constants/Style';
import { QUESTION_LIST } from '../constants/Api';
import { form_req } from '../utils/Request';

export default class TestScreen extends Component {
 constructor(props) {
  super(props);
  this.state = {
   data: [
   ],
   refreshing: false,
   fresh: true,
   animating: true,
   nomore: false,
   pageSize: 0,
   pageNumber: 1,
  };
 }
 componentDidMount() { //初始化的时候要判断长度 控制上拉加载

  const ListNums = this.fullScreenJusting(50);
  this.setState({
   pageSize: ListNums
  })
  this.onEndReachedCalled = false;
   this.getOrderList(ListNums, 1, true);

 }
 //满屏页面判断
 fullScreenJusting(ItemHeight) {
  const screnHeight = screnInfo.size.height;   //屏幕高度
  //计算列表个数
  const listNum = (screnHeight - 40) / ItemHeight;
  return Math.ceil(listNum);
 }

 getOrderList(ListNums, pageNumber, fresh) {
  let nomore;
  form_req(QUESTION_LIST, {
   page: pageNumber,
   perpage: ListNums,
  }).then(res => {
   if (res.code == 200) {
    const item = res.data;
    if (item.length < ListNums) {
     nomore = true
    } else {
     nomore = false
    }
    if (fresh) {
     this.setState({
      data: item,
      nomore: nomore
     })

    } else {
     this.setState({
      data: this.state.data.concat(item),
      nomore: nomore,
     })
    }
    // this.onEndReachedCalledDuringMomentum = true;

   } else {

   }
  });
 }

 renderItem = item => {
  return (
   <View style={styles.item} key={item.id}>
    <Text>{item.name}</Text>
   </View>
  );
 };
 //列表线
 ItemSeparatorComponent = () => {
  return <View style={styles.baseLine} />;
 };
 //头部
 ListHeaderComponent = () => { };
 //尾部
 ListFooterComponent = () => {
  return (
   <View style={styles.bottomfoot}>
    {
     this.state.data.length != 0 ?
      this.state.nomore ? (
       <Text style={styles.footText}>- 我是有底线的 -</Text>
      ) : (
        <View style={styles.activeLoad}>
         <ActivityIndicator size="small" animating={this.state.animating} />
         <Text style={[styles.footText, styles.ml]}>加载更多...</Text>
        </View>
       )
      :
      null
    }

   </View>
  );
 };
 //为空时
 ListEmptyComponent() {
  return (
   <View style={styles.noListView}>
    {/* <Image
     style={styles.noListImage}
     source={require('../images/status/order_no_record.png')}
    /> */}
    <Text style={styles.NoListText}>暂无订单</Text>
   </View>
  );
 }
 _keyExtractor = (item,index) => item.id;

 _onEndReached = () => {
  if (!this.state.nomore && this.onEndReachedCalled ) {
   this.getOrderList(this.state.pageSize, ++this.state.pageNumber, false);
  }
  this.onEndReachedCalled=true;

 };
 _onRefresh() {
  this.setState({ nomore: false, pageNumber: 1 }, () => {
   this.getOrderList(this.state.pageSize, 1, true);
  })

 }

 render() {
  return (
   <SafeAreaView style={BaseStyle.flex}>
    <View style={styles.listConten}>
     <FlatList
      data={this.state.data}
      keyExtractor={this._keyExtractor}
      onEndReached={this._onEndReached}
      refreshing={true}
      renderItem={({ item }) => this.renderItem(item)}
      ItemSeparatorComponent={this.ItemSeparatorComponent}
      ListEmptyComponent={this.ListEmptyComponent}
      ListFooterComponent={this.ListFooterComponent}
      onEndReachedThreshold={0.1}
      refreshControl={
       <RefreshControl
        refreshing={this.state.refreshing}
        colors={['#ff0000', '#00ff00', '#0000ff']}
        progressBackgroundColor={"#ffffff"}
        onRefresh={() => {
         this._onRefresh();
        }}
       />
      }
     />
    </View>
   </SafeAreaView>
  );
 }
}

const styles = StyleSheet.create({
 listConten: {
  flex: 1,
  backgroundColor: '#ffffff',
 },
 item: {
  flexDirection: 'row',
  justifyContent: 'center',
  alignItems: "center",
  backgroundColor: '#ffffff',
  height: 50,
 },
 baseLine: {
  width: screnInfo.size.width,
  height: 1,
  backgroundColor: '#eeeeee',
 },
 noListView: {
  width: screnInfo.size.width,
  height: screnInfo.size.height - 140,
  justifyContent: 'center',
  alignItems: 'center',
 },
 NoListText: {
  marginTop: 15,
  fontSize: 18,
  color: '#999999',
 },
 noListImage: {
  width: 130,
  height: 140,
 },
 bottomfoot: {
  flexDirection: 'row',
  justifyContent: 'center',
  alignItems: 'center',
  padding: 10,
 },
 footText: {
  marginTop: 5,
  fontSize: 12,
  color: '#999999',
 },

 activeLoad: {
  flexDirection: 'row',
  justifyContent: 'center',
  alignItems: 'center',
 },
 ml: {
  marginLeft: 10,
 },
});
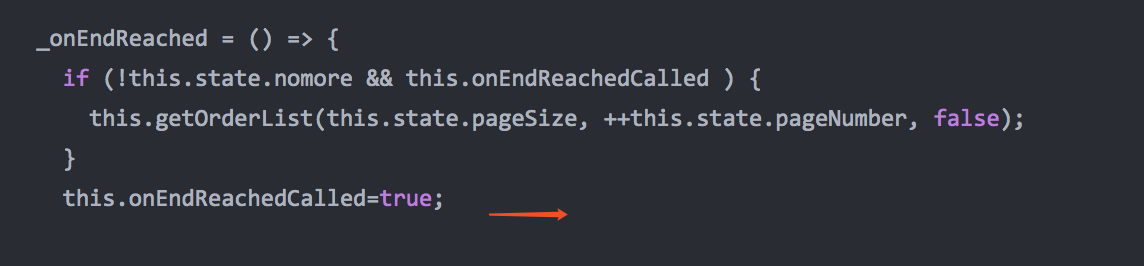
此处需要注意一个常见陷阱:页面初始化加载时,onEndReached 可能会被意外主动触发。为此,代码中引入一个布尔开关变量 this.onEndReachedCalled,初始值设为 false;当接口调用完成且确认触发有效后,再将其设置为 true,从而避免重复请求。
上述代码逻辑清晰易懂。若对实现细节有任何疑问或遇到问题,欢迎在评论区留言交流,希望本文内容能对各位的学习有所帮助,同时也感谢大家的支持。