

本文介绍如何使用Angular、Bootstrap和Spring Boot实现前端分页功能。通过集成ui-bootstrap-tpls.min.js和JpaRepository,利用uib-pagination组件与后端接口对接,结合MySQL等数据库的SQL分页语句,实现高效的数据展示。
前端资源引入
实现该功能需要引入特定的JavaScript文件。
必须使用angular.js,注意避免使用angular.min.js,否则可能导致分页控件无法显示。
需要引入ui-bootstrap-tpls.min.js文件。
还需要引入angular-animate.js文件。
实现该功能需要引入特定的CSS样式文件。
必须使用bootstrap.min.css文件。
由于本项目使用了路由功能,因此将上述JavaScript和CSS文件的引用统一放置在一个主HTML文件中,请在HTML页面中添加这些文件引用。
分页原理与参数计算
在开始编码之前,先简要介绍分页的基本原理。
分页的核心逻辑实际上对应一条SQL查询语句。
例如,当用户查看第二页时,系统需要获取第16到第30条数据。
在MySQL数据库中,该操作对应的语句为select * from table limit 15,15 order by id desc。
 Sql server中是select * from (select top 15 * from
 (select top (30) * from table order by id desc) order by available asc) order by id desc
 Oracle是(oracle中的row从1开始):select * from
  (select a.*,rownum from
  (select * from tablet order by id desc) a
  ) b
 where b.rownum between 16 and 30
通常情况下,查询结果采用倒序排列,以便将用户最新插入的数据展示在最前面。
那么SQL语句中的这些数值是如何计算得出的呢?它们基于两个参数:1、CurrentPage(当前页码);2、PageSize(每页显示条数)。因此,后端需要从前端获取这两个数值。此外,为了告知用户总页数,还需要获取3、TotalSize(总记录数)。
有了上述1、2、3数值,即可进行分页。前端需Table展示数据,并借助Bootstrap提供的uib-pagination小控件供用户选择页码,从而大幅降低工作量。后端利用Jpa提供的分页接口,继承JpaRepository即可实现,无需编写额外代码。
接下来重点介绍Table、uib-pagination组件以及JpaRepository接口的具体用法。
前端UI与逻辑实现
以下是HTML页面的相关代码。
<div data-ng-controller="QuestionCtrl" class="container" style="width: 1900px;">
 <br>
 <table class="table table-bordered table-hover ">
  <thead>
   <tr>
    <th class="text-center"><input type="checkbox"
     data-ng-model="allChecked" data-ng-change="checkAll(allChecked)" /></th>
    <th class="text-center">序号</th>
    <th class="text-center">题目</th>
    <th class="text-center">A</th>
    <th class="text-center">B</th>
    <th class="text-center">C</th>
    <th class="text-center">D</th>
    <th class="text-center">答案</th>
    <th class="text-center">答题数</th>
    <th class="text-center">正确数</th>
    <th class="text-center">正确率</th>
   </tr>
  </thead>
  <tbody>
   <tr data-ng-repeat="item in items">
    <td class="text-center"><input type="checkbox"
     data-ng-model="item.$checked" data-ng-changed="checkedChange(item.id,item.$checked)"/></td>
    <td class="text-center"><span data-ng-bind="$index+1"></span></td>
    <td class="text-center"
     data-ng-bind="item.test"></td>
    <td class="text-center" data-ng-bind="item.op1"></td>
    <td class="text-center" data-ng-bind="item.op2"></td>
    <td class="text-center" data-ng-bind="item.op3"></td>
    <td class="text-center" data-ng-bind="item.op4"></td>
    <td class="text-center" data-ng-bind="item.answer"></td>
    <td class="text-center" data-ng-bind="item.total"></td>
    <td class="text-center" data-ng-bind="item.totalCorrect"></td>
    <td class="text-center">
    <span data-ng-if="item.total!=0" data-ng-bind="item.totalCorrect / item.total * 100 | number:2 "></span>
    <span data-ng-if="item.total==0" data-ng-bind="0"></span>
    %</td>
   </tr>
  </tbody>
 </table>
 <div class="text-right">
 <button class="btn btn-defualt" style="float: left" data-ng-click="deleteItems()">删除</button>
 <span style="color:#ff0000;"><uib-pagination total-items="TotalItems" ng-model="currentPage" items-per-page = "numPerPage" max-size="maxSize" class="pagination" first-text="首页" previous-text="上一页" next-text="下一页" last-text="末页" boundary-links="true" ng-change="pageChanged()" force-ellipses="false"></uib-pagination></span>
 </div>
 </div>
分页功能通过uib-pagination标签实现,主要使用的属性包括:
total-items:表示总记录数。
items-per-page:表示每页显示的记录条数。
max-size:决定用户可见的页码按钮数量,若不理解可调整该数值观察变化。
ng-model:绑定当前所在的页码。
上述四个属性的值与JavaScript变量进行双向绑定。
boundary-link:用于显示“首页”和“末页”按钮。
force-ellipses:当值为true时,超过max-size限制的页码将以省略号形式展示。
以下是相关的JavaScript代码。
var app = angular.module("APP",['ui.bootstrap', 'ngAnimate']);
app.controller('QuestionCtrl', function($scope, $uibModal, $http) {
 <span style="color:#ff0000;">$scope.currentPage = 1;//当前页
 $scope.numPerPage = 15;
 $scope.maxSize = 5;
 $http({
  url : '/getExamsByPage',
  method : 'post',
  params : {
   'currentPage' : $scope.currentPage - 1,
   'numPerPage' : $scope.numPerPage
  }
 }).success(function(response) {
  $scope.TotalItems = response.totalElements;
  $scope.items = response.content;
 });
 $scope.pageChanged = function() {
  $http({
   url : '/getExamsByPage',
   method : 'post',
   params : {
    'currentPage' : $scope.currentPage - 1,
    'numPerPage' : $scope.numPerPage
   }
  }).success(function(response) {
   $scope.TotalItems = response.totalElements;
   $scope.items = response.content;
  });
 }</span>
 $scope.checkAll = function(checked) {
  angular.forEach($scope.items, function(item) {
   item.$checked = checked;
  });
 };
 $scope.deleteExam = function(id) {
  $http({
   url : '/deleteexam',
   method : 'post',
   params : {
    'id' : id,
    'currentPage' : $scope.currentPage - 1,
    'numPerPage' : $scope.numPerPage
   }
  }).success(function(response) {
   $scope.TotalItems = response.totalElements;
   $scope.items = response.content;
  });
 }
 $scope.deleteItems = function() {
  var checkedlist = new Array();
  angular.forEach($scope.items, function(item) {
   if (item.$checked == true)
    checkedlist.push(item.id);
  });
  $http({
   url : "/deleteexams",
   method : "post",
   params : {
    'ids' : checkedlist,
    'currentPage' : $scope.currentPage - 1,
    'numPerPage' : $scope.numPerPage
   }
  }).success(function(response) {
   $scope.TotalItems = response.totalElements;
   $scope.items = response.content;
  });
 };
});
每次请求后台时,需要将当前页码及每页数量发送至后端。
前端接收到的JSON数据结构如下所示。
{"content":[{"id":225,"test":"办公自动化是计算机的一项应用,按计算机应用分类,它属于____。","op1":"数据处理","op2":"科学计算","op3":"实时控制","op4":"辅助设计","answer":"A","total":2,"totalCorrect":1},{"id":224,"test":"软件由___和文档两部分组成。","op1":"数据","op2":"指令","op3":"程序","op4":"工具","answer":"C","total":2,"totalCorrect":1},{"id":223,"test":"为达到某一目的而编写的计算机指令序列称为____。","op1":"软件","op2":"字符串","op3":"程序","op4":"命令","answer":"C","total":2,"totalCorrect":1},{"id":222,"test":"办公自动化是计算机的一项应用,按计算机应用分类,它属于____。","op1":"数据处理","op2":"科学计算","op3":"实时控制","op4":"辅助设计","answer":"A","total":2,"totalCorrect":1},{"id":220,"test":"为达到某一目的而编写的计算机指令序列称为____。","op1":"软件","op2":"字符串","op3":"程序","op4":"命令","answer":"C","total":2,"totalCorrect":1},{"id":219,"test":"办公自动化是计算机的一项应用,按计算机应用分类,它属于____。","op1":"数据处理","op2":"科学计算","op3":"实时控制","op4":"辅助设计","answer":"A","total":2,"totalCorrect":1},{"id":218,"test":"软件由___和文档两部分组成。","op1":"数据","op2":"指令","op3":"程序","op4":"工具","answer":"C","total":2,"totalCorrect":1},{"id":217,"test":"为达到某一目的而编写的计算机指令序列称为____。","op1":"软件","op2":"字符串","op3":"程序","op4":"命令","answer":"C","total":2,"totalCorrect":1},{"id":216,"test":"办公自动化是计算机的一项应用,按计算机应用分类,它属于____。","op1":"数据处理","op2":"科学计算","op3":"实时控制","op4":"辅助设计","answer":"A","total":2,"totalCorrect":1},{"id":215,"test":"软件由___和文档两部分组成。","op1":"数据","op2":"指令","op3":"程序","op4":"工具","answer":"C","total":2,"totalCorrect":1}],"last":false,"totalPages":9,"totalElements":86,"number":0,"size":10,"sort":[{"direction":"DESC","property":"id","ignoreCase":false,"nullHandling":"NATIVE","ascending":false}],"numberOfElements":10,"first":true}后端接口与数据访问
以下是后端Controller层的代码。
@RequestMapping(value = "/getExamsByPage")
 @ResponseBody
 public Page<Exam> getExamsByPage(@RequestParam(value = "currentPage",defaultValue = "0") Integer page,
   @RequestParam(value = "numPerPage",defaultValue = "10") Integer pageSize) {
  Sort sort = new Sort(Direction.DESC, "id");//设置排序方式
  Pageable pageable = new PageRequest(page, pageSize, sort);//构建Pageable对象,改分页查询是通过jpa的PagingAndSortingRepository接口完成的
  Page<Exam> Exams = examrepository.findAll(pageable);
  return Exams;
 }
以下是Repository层的代码。
@Transactional
public interface ExamRepository extends JpaRepository<Exam, Integer> {
}
Controller中调用的findAll方法由PagingAndSortingRepository实现,而JpaRepository继承自PagingAndSortingRepository,因此也具备findAll方法,不清楚的读者可查阅相关接口文档。
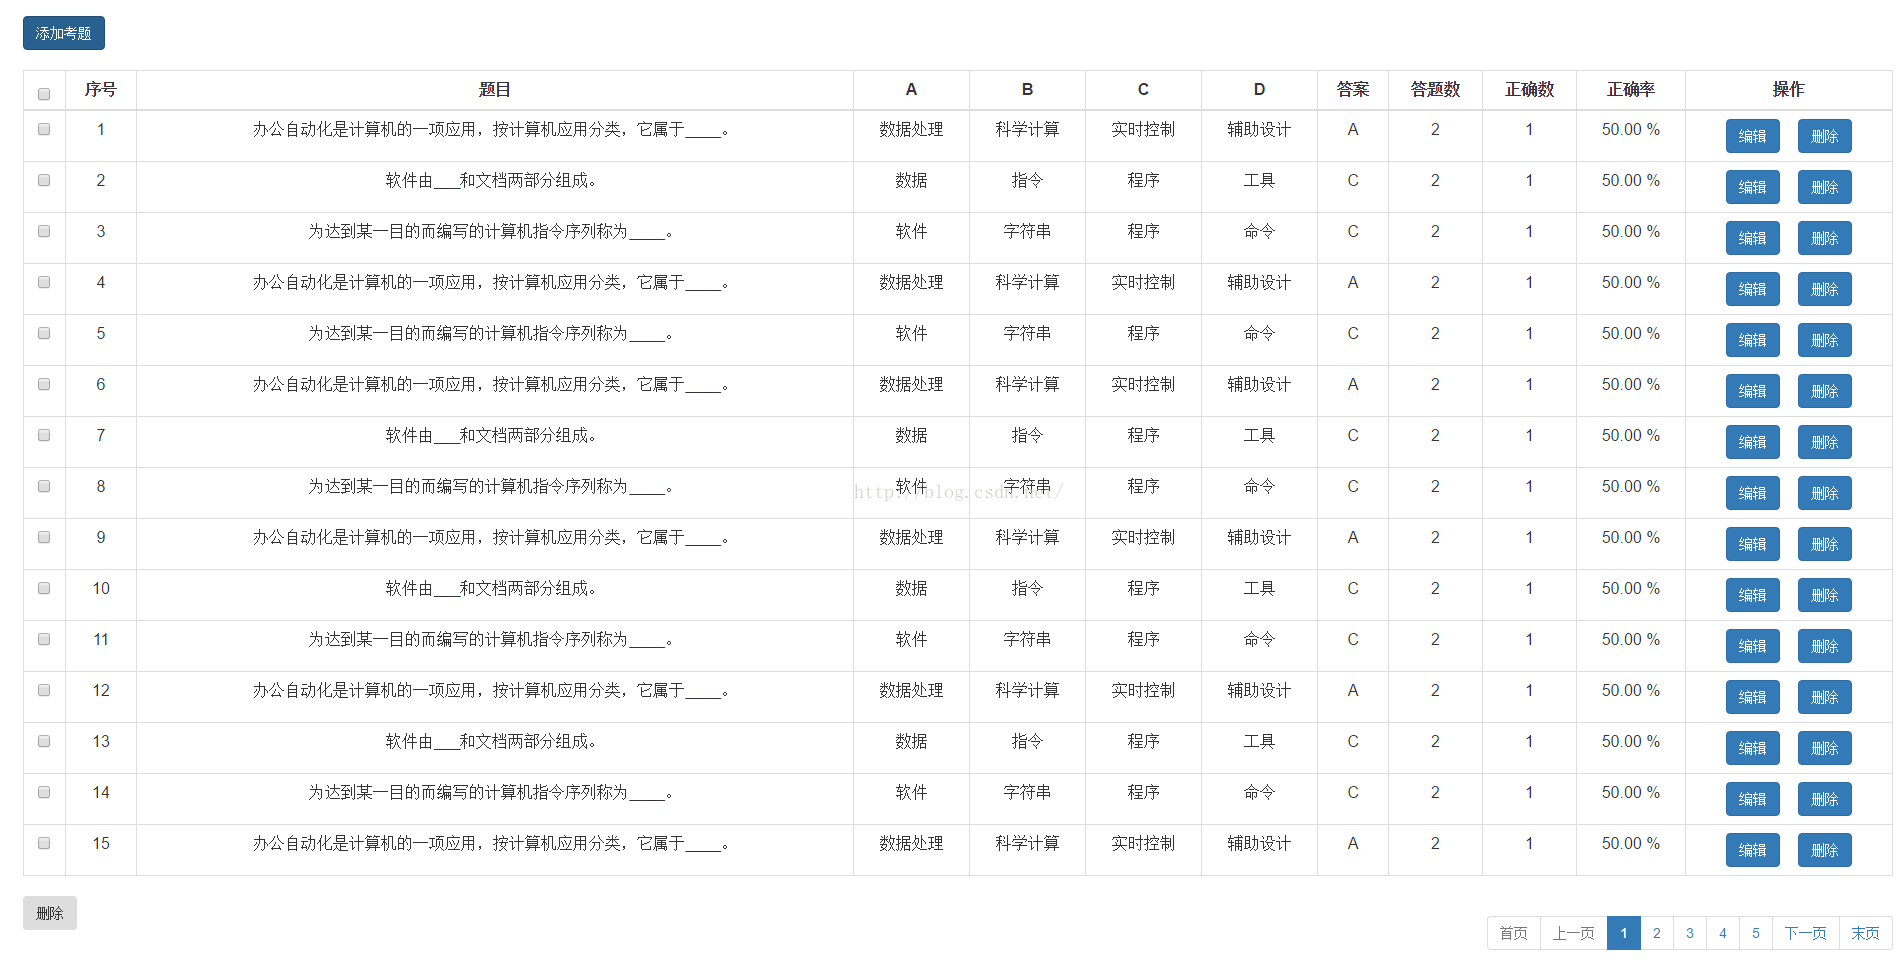
至此,分页显示功能已完成,效果如下图所示。
总结
以上介绍了Angular+Bootstrap+Spring Boot实现分页功能的实例代码,希望对大家有所帮助。如有疑问请留言,小编会及时回复。感谢大家对本站的支持!