

本文介绍如何使用原生JavaScript实现基础的选项卡切换功能。通过获取DOM元素、绑定点击事件及控制CSS类名,实现内容区域的动态显示与隐藏,适合初学者理解前端交互逻辑。
原生JS选项卡实现效果与代码
首先展示最终实现的视觉效果,如下图所示:
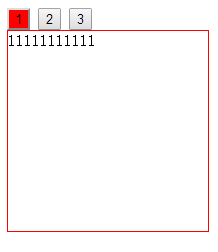
具体的实现代码逻辑如下所示:
<!DOCTYPE html>
<html>
 <head>
 <meta charset="UTF-8">
 <title>原生js选项卡写法</title>
 <style>
  #div1 div{width: 200px;height: 200px;border: 1px solid #FF0000;display: none;}
  .active{background: red;}
 </style>
 <script>
  window.onload=function(){//原生js选项卡写法
  var oDiv = document.getElementById('div1');
  var aInput = document.getElementsByTagName('input');
  var aCon = oDiv.getElementsByTagName('div');
  for(var i=0;i<aInput.length;i++){
   aInput[i].index = i;
   aInput[i].onclick = function(){
   for(var i=0;i<aInput.length;i++){
    aInput[i].className = '';
    aCon[i].style.display = 'none';
   }
   this.className= 'active';
   aCon[this.index].style.display = 'block';
   }
  }
  }
 </script>
 </head>
 <body>
 <div id="div1">
  <input class="active" type="button" value="1" />
  <input type="button" value="2"/>
  <input type="button" value="3"/>
  <div style="display: block;">11111111111</div>
  <div>22222222222</div>
  <div>333333333333</div>
 </div>
 </body>
</html>
以上内容为本文的核心总结,旨在帮助读者掌握选项卡的基本实现方法,若对您的学习或工作有所助益,欢迎继续支持本站。