

本文对比UniApp中两种表单校验方式:命令式与声明式。命令式通过submit方法内validateForm显式校验,适合复杂逻辑和异步检查;声明式利用computed计算属性控制按钮disabled状态,实现实时反馈。通过Vue2语法Demo展示代码实现,分析各自适用场景与用户体验差异,帮助开发者选择合适方案。
本文主要基于实际开发中的Demo案例进行讲解,分享实战经验。
首先明确概念:什么是命令式,什么是声明式。
- 在命令式模式下,提交按钮始终可用,只有点击提交后,才会提示不满足条件的字段。
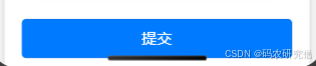
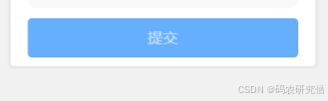
- 在声明式模式下,当条件不满足时,提交按钮会呈现灰色禁用状态。
命令式校验适用于以下场景:提交逻辑复杂,涉及异步校验(如服务端唯一性检查);表单字段较多,依赖用户行为触发验证;需要复用校验函数,或表单逻辑分散在多处。
声明式校验适用于以下场景:表单结构简单明了;优先考虑用户体验,提前告知无法提交的情况;状态可视化,让用户一目了然。
| 对比项 | 命令式校验(方法中校验) | 声明式校验(computed + disabled 控制) |
|---|---|---|
| 方式 | 在 submit() 方法内通过 validateForm() 显式校验 | 通过 computed 计算属性实时判断是否可提交 |
| 编程范式 | 命令式(Imperative) | 声明式(Declarative) |
| 表达方式 | 手动控制流程:如果失败就 return false | 自动计算状态:按钮根据是否满足条件自动禁用 |
| 可复用性 | 校验逻辑聚焦在 validateForm(),但要手动调用 | 校验逻辑绑定在状态中,按钮等 UI 自动响应 |
| 用户体验 | 用户点击“提交”后才提示不通过 | 一目了然,提交按钮禁用,无法误触提交 |
| 灵活性 | 可以灵活插入额外逻辑,如提交前弹窗确认 | 逻辑适合纯状态驱动,复杂流程需另外处理 |
| 适用场景 | 需要流程控制、嵌套逻辑、异步校验时更适合 | 表单项简单明确、状态驱动时更适合 |
1. 实战分析
从实际项目中抽取的Demo较为简易,旨在说明核心逻辑。
命令式submit校验方式(validateForm)的实现逻辑如下。
<template>
  <button type="primary" @click="submit">提交</button>
</template>

<script>
export default {
  data() {
    return {
      imgCntrF: [],
      damPhotoList: []
    };
  },
  methods: {
    validateForm() {
      if (!this.imgCntrF.length) {
        uni.showToast({ title: '请拍摄箱门照片', icon: 'none' });
        return false;
      }
      if (this.damPhotoList.length < 2) {
        uni.showToast({ title: '请至少拍摄 2 张照片', icon: 'none' });
        return false;
      }
      return true;
    },
    async submit() {
      if (!this.validateForm()) return;
      // 执行提交逻辑
      console.log("提交成功");
    }
  }
}
</script>
声明式computed控制按钮状态的实现逻辑如下。
<template>
  <button type="primary" :disabled="!canSubmit" @click="submit">提交</button>
</template>

<script>
export default {
  data() {
    return {
      photoList: {
        door: '',  // 对应 imgCntrF
        side: ''
      },
      damPhotoList: [],
      photoField: [
        { key: 'door', label: '箱门照片' },
        { key: 'side', label: '侧面照片' }
      ]
    };
  },
  computed: {
    canSubmit() {
      return this.photoField.every(field => this.photoList[field.key]) &&
             this.damPhotoList.length >= 2;
    }
  },
  methods: {
    submit() {
      console.log("提交成功");
    }
  }
}
</script>
2. Demo代码示例
以下Demo基于UniApp,采用Vue2语法及script写法。
命令式校验提交(Imperative)的代码实现。
<template>
  <view class="container">
    <view class="section">
      <text>箱门照片:</text>
      <button @click="selectBoxDoorPhoto">选择照片</button>
      <image v-if="imgCntrF" :src="imgCntrF" class="img-preview" />
    </view>

    <view class="section">
      <text>破损照片:</text>
      <button @click="addDamPhoto">添加照片</button>
      <view class="photo-list">
        <image v-for="(photo, index) in damPhotoList" :key="index" :src="photo" class="img-preview" />
      </view>
    </view>

    <button type="primary" @click="submit">提交</button>
  </view>
</template>

<script>
export default {
  data() {
    return {
      imgCntrF: '', // 箱门照片 URL
      damPhotoList: [] // 破损照片 URL 列表
    };
  },
  methods: {
    selectBoxDoorPhoto() {
      uni.chooseImage({
        count: 1,
        success: (res) => {
          this.imgCntrF = res.tempFilePaths[0];
        }
      });
    },
    addDamPhoto() {
      uni.chooseImage({
        count: 1,
        success: (res) => {
          this.damPhotoList.push(res.tempFilePaths[0]);
        }
      });
    },
    validateForm() {
      if (!this.imgCntrF) {
        uni.showToast({ title: '请拍摄箱门照片', icon: 'none' });
        return false;
      }
      if (this.damPhotoList.length < 2) {
        uni.showToast({ title: '请至少拍摄 2 张破损照片', icon: 'none' });
        return false;
      }
      return true;
    },
    submit() {
      if (!this.validateForm()) return;

      // 模拟提交成功
      uni.showToast({ title: '提交成功', icon: 'success' });
    }
  }
};
</script>

<style>
.container {
  padding: 20rpx;
}
.section {
  margin-bottom: 30rpx;
}
.img-preview {
  width: 200rpx;
  height: 200rpx;
  margin-top: 10rpx;
}
.photo-list {
  display: flex;
  flex-wrap: wrap;
  gap: 10rpx;
}
</style>
声明式按钮控制提交(Declarative)的代码实现。
<template>
  <view class="container">
    <view class="section">
      <text>箱门照片:</text>
      <button @click="selectBoxDoorPhoto">选择照片</button>
      <image v-if="photoList.door" :src="photoList.door" class="img-preview" />
    </view>

    <view class="section">
      <text>破损照片:</text>
      <button @click="addDamPhoto">添加照片</button>
      <view class="photo-list">
        <image v-for="(photo, index) in damPhotoList" :key="index" :src="photo" class="img-preview" />
      </view>
    </view>

    <button type="primary" :disabled="!canSubmit" @click="submit">提交</button>
  </view>
</template>

<script>
export default {
  data() {
    return {
      photoList: {
        door: '' // 箱门照片
      },
      damPhotoList: []
    };
  },
  computed: {
    canSubmit() {
      return !!this.photoList.door && this.damPhotoList.length >= 2;
    }
  },
  methods: {
    selectBoxDoorPhoto() {
      uni.chooseImage({
        count: 1,
        success: (res) => {
          this.photoList.door = res.tempFilePaths[0];
        }
      });
    },
    addDamPhoto() {
      uni.chooseImage({
        count: 1,
        success: (res) => {
          this.damPhotoList.push(res.tempFilePaths[0]);
        }
      });
    },
    submit() {
      uni.showToast({ title: '提交成功', icon: 'success' });
    }
  }
};
</script>

<style>
.container {
  padding: 20rpx;
}
.section {
  margin-bottom: 30rpx;
}
.img-preview {
  width: 200rpx;
  height: 200rpx;
  margin-top: 10rpx;
}
.photo-list {
  display: flex;
  flex-wrap: wrap;
  gap: 10rpx;
}
</style>
至此,关于UniApp表单校验两种方式的对比详解介绍完毕。如需了解更多UniApp表单校验相关内容,请搜索本站历史文章或继续浏览后续文章,感谢支持。