

本文详解在UniApp项目中如何封装网络请求,结合uView拦截器统一处理配置与错误。同时介绍利用Vuex及vuex-persistedstate插件实现全局状态持久化存储,涵盖从接口定义、拦截器配置到页面调用的完整流程,帮助开发者提升代码复用性与维护效率。
首先在common文件夹下创建http.api.js文件,用于集中定义所有需要调用的接口。
const install = (Vue, vm) => {
    //验证码登陆
    let mobilelogin = (params = {}) => vm.$u.http.post('api/user/mobilelogin', params);
   // 将各个定义的接口名称,统一放进对象挂载到vm.$u.http.api(因为vm就是this,也即this.$u.http.api)下
    vm.$u.api = {
        mobilelogin,
    };
}

export default {
    install
}
接着在common文件夹下编写http.interceptor.js,对网络请求进行统一封装,处理基础配置、请求拦截及响应逻辑。
// 此vm参数为页面的实例,可以通过它引用vuex中的变量
import Vue from 'vue'
module.exports = (vm) => {
	// 初始化请求配置
	uni.$u.http.setConfig((config) => {
		/* config 为默认全局配置*/
		config.baseURL = 'xxxxxxx'; /* 根域名 */
		config.header = {
			'content-type': 'application/x-www-form-urlencoded;charset=UTF-8',
		}

		return config
	})

	// 请求拦截
	uni.$u.http.interceptors.request.use((config) => {
		config.header.token = Vue.prototype.$store.state.member.token

		config.header.lang = Vue.prototype.$store.state.lang;

		console.log(config, 'config');

		return config
	})

	// 响应拦截

	uni.$u.http.interceptors.response.use((res) => {

		console.log(res, '成功')
		if (res.statusCode == 200) {
			// res为服务端返回值,可能有code,result等字段
			// 这里对res.result进行返回,将会在this.$u.post(url).then(res => {})的then回调中的res的到
			// 如果配置了originalData为true,请留意这里的返回值
			console.log(res.hasOwnProperty('data'));
			if (res.hasOwnProperty('data')) {
				if (res.data.hasOwnProperty('code') && res.data.code == 1) {
					if (res.data.msg != "" && res.data.msg != "success" && res.data.msg != 'ok') {
						uni.$u.toast(res.data.msg)
						// return res.data.data;
					}
					return res.data.data;
				} else {
					uni.$u.toast(res);
					if (res.data.hasOwnProperty('msg')) {
						uni.$u.toast(res.data.msg);

					} else {
						console.log(res);
						uni.$u.toast('返回参数错误', res);
					}
					return false;
				}
			} else {
				uni.$u.toast('不能识别数据1')

				return false;
			}
		}
		return res
	}, (res1) => {
		/*  对响应错误做点什么 (statusCode !== 200)*/
		console.log(res1, '失败')
		if (res1.statusCode == 401) {
			// 假设401为token失效,这里跳转登录
			uni.$u.toast('请登录后操作');
			console.log(Vue.prototype.$store, 'Vue.prototype.$store');
			Vue.prototype.$store.commit('SET_MEMBER', {})

			setTimeout(() => {
				// 此为uView的方法,详见路由相关文档
				uni.$u.route({
					url: '/pages/login/login',

				})

			}, 1500)
			return res1.data;
		} else {
			uni.$u.toast('不能识别数据2');
			// 如果返回false,则会调用Promise的reject回调,
			// 并将进入this.$u.post(url).then().catch(res=>{})的catch回调中,res为服务端的返回值
			return false;
		}
		return Promise.reject(res)
	})
}
在全局数据管理中,于store文件夹下的index.js文件内定义Vuex状态,用于存储和管理应用所需的全局数据。
import Vue from 'vue'
import Vuex from 'vuex'

import createPersistedState from 'vuex-persistedstate'

Vue.use(Vuex)

const store = new Vuex.Store({
	plugins: [
	    // 可以有多个持久化实例
	    createPersistedState({
	      key: 'app_config_data',  // 状态保存到本地的 key
	      paths: ['member', 'cookieKey'],  // 要持久化的状态,在state里面取,如果有嵌套,可以  a.b.c
	      storage: {  // 存储方式定义
	        getItem: (key) => uni.getStorageSync(key), // 获取
	        setItem: (key, value) => uni.setStorageSync(key, value), // 存储
	        removeItem: (key) => uni.removeStorageSync(key) // 删除
	      }
	    })
	],
	state: {
		store: {},
		cart: [],
		orderType: 'takein',
		address: {},
		addresses: [],

		member: {
			// avatar: "http://cdn.shop.weivee.com/shop/20200408/6162b21922f336ae9b320bc06582ab7f.png",
			// birthday: null,
			// couponNum: 0,
			// currentValue: "1.00",
			// gender: 0,
			// id: 2,
			// level: 1,
			// mobile: "15975073045",
			// money: "4789.20",
			// openid: "oEY7Y5XYukLQySoKA7sPGWSDtktA",
			// score: 0,
			// token: "cb3136ea-97d3-42d3-a676-15ed170fa725",
			// token: "",
			// username: "游客"
		},
		openid:"",
		lang: 'zh-cn',
		cookieKey:'PHPSESSID=e4dk4o2utr3c0n95tp42p745ai',
		// 默认地为你为北京地址
		location: {},
		tableNumber:''
	},
	getters: {
		isLogin: state => Object.keys(state.member).length > 0	//是否登录
	},
	mutations: {
		SET_ORDER_TYPE(state, type) {
			state.orderType = type
		},
		SET_MEMBER(state, member) {
			state.member = member
		},
		SET_ADDRESS(state, address) {
			state.address = address
		},
		SET_ADDRESSES(state, addresses) {
			state.addresses = addresses
		},
		SET_STORE(state, store) {
			state.store = store
		},
		SET_CART(state, cart) {
			state.cart = cart
		},
		REMOVE_CART(state) {
			state.cart = []
		},
		setCookie(state, provider) {
			state.cookie = provider;
			uni.setStorage({
				key: 'cookieKey',
				data: provider
			});
		},
		SET_LOCATION(state, location) {
			state.location = location;
		},
		SET_OPENID(state, openid) {
			state.openid = openid;
		},
		SET_TABLE_NUMBER(state, tableNumber) {
			state.tableNumber = tableNumber
		},
	},
	actions: {

	}
})

export default store
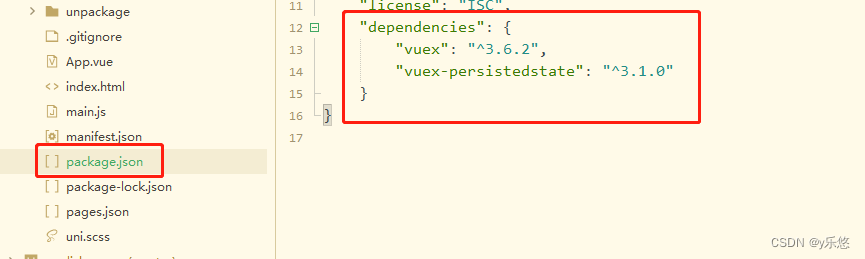
注意:在使用Vuex之前,需先通过npm i vuex命令安装依赖。此外,为了实现状态持久化,还需导入vuex-persistedstate插件,执行npm i vuex-persistedstate进行安装。
在main.js入口文件中声明并挂载相关模块。示例代码中包含了多种配置,实际使用时请根据项目需求选取必要的部分进行配置。
import App from './App'

import store from './store'
// #ifndef VUE3
import Vue from 'vue'

Vue.config.productionTip = false
// console.log(Vue.prototype.$store);
Vue.prototype.$store = store
console.log(Vue.prototype.$store);

App.mpType = 'app'
// main.js
import uView from "uview-ui";
Vue.use(uView);
const app = new Vue({
	store,
	...App
})

// http拦截器,将此部分放在new Vue()和app.$mount()之间,才能App.vue中正常使用
import httpInterceptor from '@/common/http.interceptor.js'
Vue.use(httpInterceptor, app)

// http接口API集中管理引入部分
import httpApi from '@/common/http.api.js'
Vue.use(httpApi, app)


Vue.prototype.$store = store
console.log(Vue.prototype.$store);
Vue.prototype.$util = util
Vue.prototype.$baseUrl = 'xxxx'//根域名
app.$mount()
// #endif

// #ifdef VUE3
import {
	createSSRApp
} from 'vue'
export function createApp() {
	const app = createSSRApp(App)
	return {
		app
	}
}
// #endif
完成上述配置后,即可在具体的页面组件中发起实际应用请求,调用之前封装好的接口。
let data = await this.$u.api.mobilelogin({
//所传参数
						mobile: _this.tel,
						captcha: _this.code,
						type: 1
					});
					console.log(data, 'data');
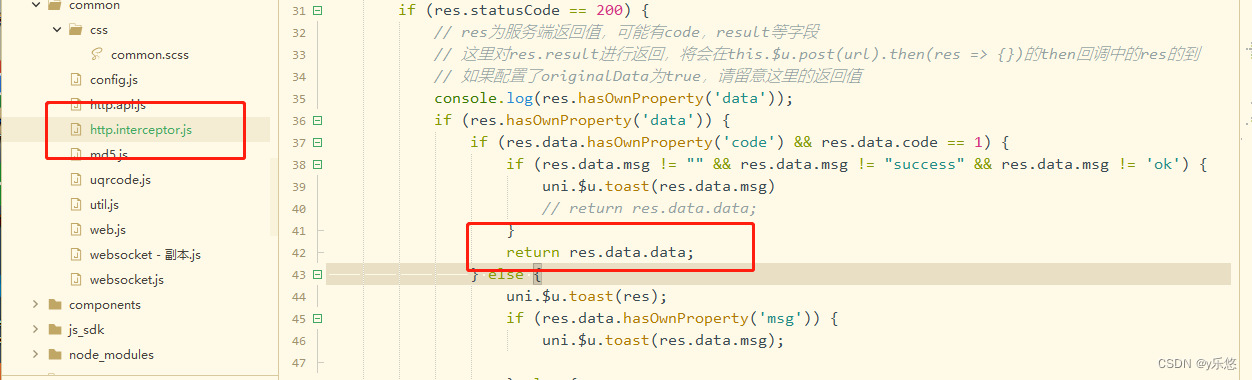
此处输出的data数据结构与common文件夹下http.interceptor.js中的配置紧密相关。在本例中,直接获取的是网络响应中data.data层级的数据。
以上阐述了网络请求的核心逻辑及部分关键代码。若需深入了解Vuex的详细用法,可参考相关技术文档:www.jb51.net/article/254722.htm
总结
至此,关于前端UniApp封装网络请求及其实际应用的教程已介绍完毕。如需获取更多相关技术内容,建议搜索本站历史文章或继续阅读后续系列文章,感谢大家的支持!