

本文详细介绍Webpack多入口打包的配置方法。通过定义多个entry入口和对应的output输出,结合HtmlWebpackPlugin插件实现多HTML文件分别引入对应JS资源。示例涵盖基础配置及复杂多页面场景,包含chunks按需加载策略,帮助开发者构建高效的多页面应用。
Webpack多入口打包
在开始之前,需要明确基于Webpack构建的应用类型,并确定项目的目录结构。
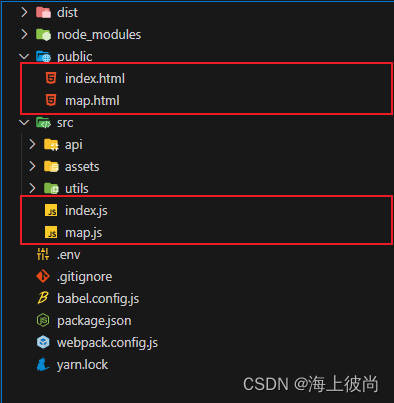
这两个JavaScript文件分别对应两个HTML文件,在HTML中需要分别引入对应的JS文件。处理HTML中引入的问题可以使用 这个插件。
配置:
module.exports = {
    entry: {
        index: path.resolve(__dirname, "./src/index.js"),
        map: path.resolve(__dirname, "./src/map.js"),
    },
    plugins: {
        new HtmlWebpackPlugin({
            template: path.resolve(__dirname, "./public/index.html"),
            filename: "index.html",
        }),
        new HtmlWebpackPlugin({
            template: path.resolve(__dirname, "./public/map.html"),
            filename: "map.html",
        }),
    }
}
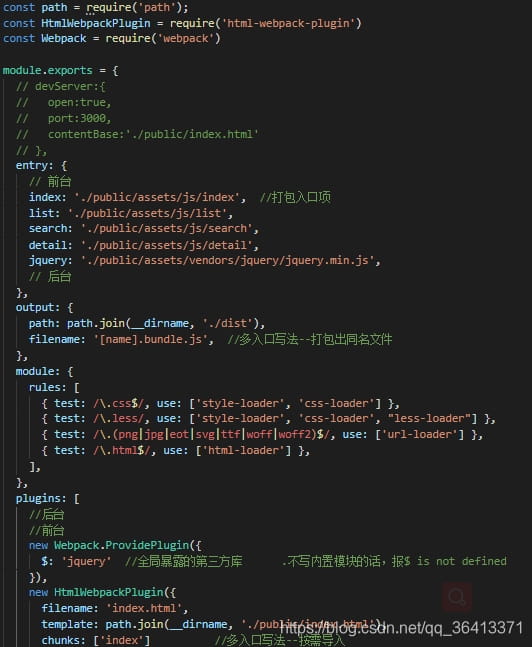
webpack:打包示例-打包多入口
入口
entry: {
    // 前台
    index: './public/assets/js/index',  //打包入口项
    list: './public/assets/js/list',
    search: './public/assets/js/search',
    detail: './public/assets/js/detail',
    jquery: './public/assets/vendors/jquery/jquery.min.js',
    // 后台
  },
出口
  output: {
    path: path.join(__dirname, './dist'),
    filename: '[name].bundle.js',  //多入口写法--打包出同名文件
  },
对应的插件
plugins: [
    //后台
    //前台
    new Webpack.ProvidePlugin({
      $: 'jquery'  //全局暴露的第三方库      .不写内置模块的话,报$ is not defined
    }),
    new HtmlWebpackPlugin({
      filename: 'index.html',
      template: path.join(__dirname, './public/index.html'),
      chunks: ['index']          //多入口写法--按需导入
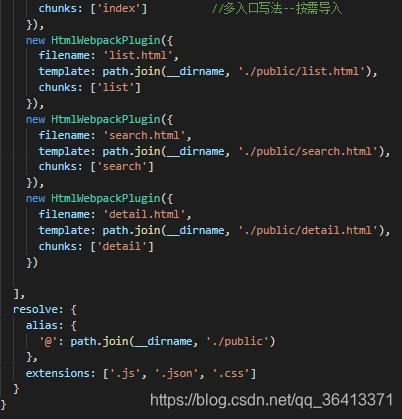
    }),
    new HtmlWebpackPlugin({
      filename: 'list.html',
      template: path.join(__dirname, './public/list.html'),
      chunks: ['list']
    }),
    new HtmlWebpackPlugin({
      filename: 'search.html',
      template: path.join(__dirname, './public/search.html'),
      chunks: ['search']
    }),
    new HtmlWebpackPlugin({
      filename: 'detail.html',
      template: path.join(__dirname, './public/detail.html'),
      chunks: ['detail']
    })
  ],
完整截图
到此这篇关于webpack多入口打包的文章就介绍到这了,更多相关webpack多入口打包内容请搜索本站以前的文章或继续浏览下面的相关文章希望大家以后多多支持本站!