

本文详细介绍在 VS Code 中使用 TypeScript 进行前端与后端开发的完整流程。内容涵盖 TypeScript 的全局安装、基础编译运行、tsconfig.json 配置文件详解、VS Code 调试器(F5)的正确配置方法,以及利用 Webpack 进行客户端模块化开发与打包发布的实战步骤。
TypeScript 作为 JavaScript 的超集,为 JS 增添了丰富的类型特性,并可编译为纯 JavaScript 在浏览器环境中运行。目前,TypeScript 已成为众多流行框架及前端应用开发的首选语言。本文将简要概述在 VS Code 中开发 TypeScript 的具体操作流程。
第一个程序
在 VS Code 中开始 TypeScript 开发,首要步骤是安装 TypeScript 环境,此处推荐使用 npm 进行全局安装:
npm install typescript -g安装完成后,可通过以下命令检查版本信息:
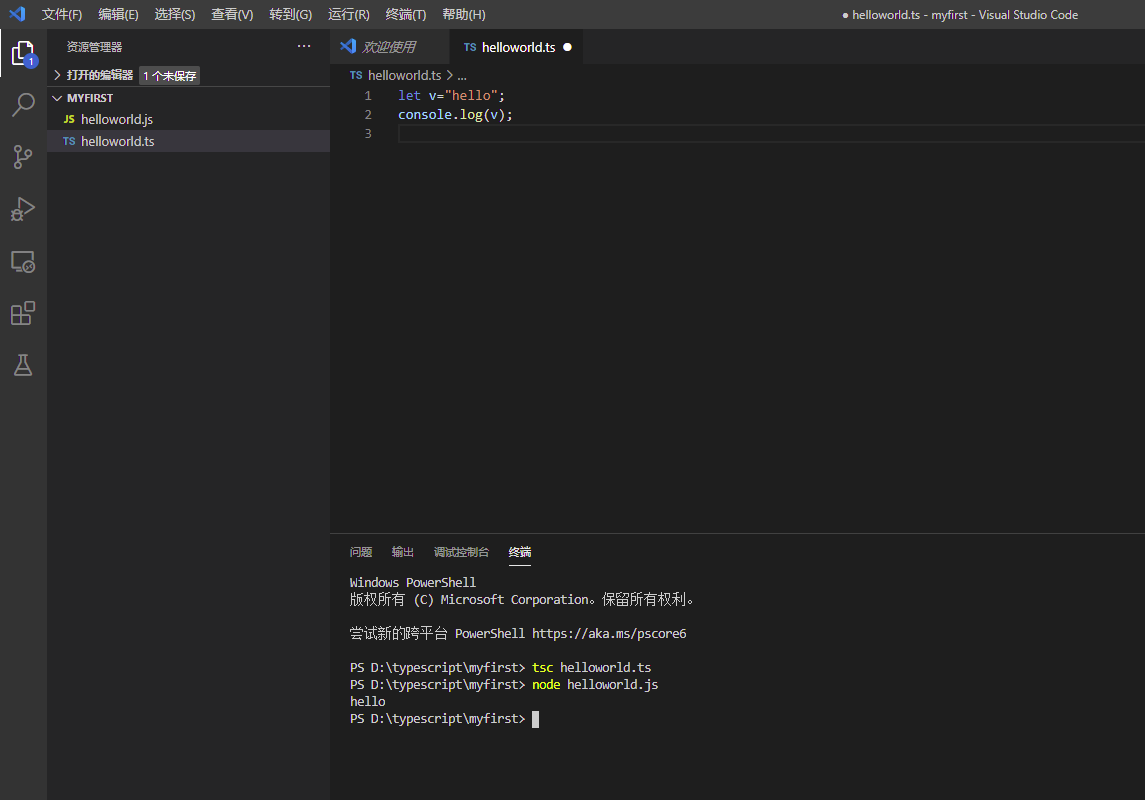
tsc -version打开控制台,创建项目文件夹并进入该目录,执行命令 code . 以启动 VS Code 并打开当前文件夹。在文件夹内新建 hello.ts 文件,并编写基础代码:
let v="hello";
console.log(v);
回到控制台,输入 tsc hello.ts 命令以生成对应的 hello.js 文件,随后运行 node hello.js 即可执行代码。
配置文件tsconfig.json
接下来,为 TypeScript 项目创建配置文件 tsconfig.json,其最简内容如下所示:
{
  "compilerOptions": {
    "target": "es5",
    "module": "commonjs"
  }
}
在编辑此文件时,VS Code 提供的智能提示功能十分便捷。常用配置项还包括 JS 代码输出路径、是否允许包含 JS 文件以及调试时的代码映射等。以下是一个更为复杂的配置示例:
{
    "compilerOptions": {
      "target": "es5",
      "module": "commonjs",
      "allowJs": true,
      "sourceMap": true,
      "outDir": "out"
    }
  }
此处将输出路径设置为 out。删除之前编译生成的 JS 文件后重新编译,注意由于存在 tsconfig.json 文件,在终端中只需输入 tsc 即可执行编译。
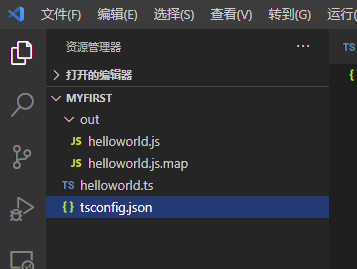
编译后的文件将保存在 out 子目录中,同时会生成对应的 map 文件。
调试
接下来介绍如何在 VS Code 中进行调试。在之前的 TS 代码界面按下 F5 进行调试时,会弹出环境选择提示框,选择 Node.js 后可能出现如下错误:
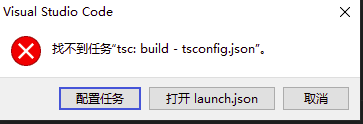
此时选择“配置任务”,然后选择“tsc: 构建 - tsconfig.json”,系统将自动创建 .vscode 文件夹及 task.json 文件,内容如下:
{
	"version": "2.0.0",
	"tasks": [
		{
			"type": "typescript",
			"tsconfig": "tsconfig.json",
			"problemMatcher": [
				"$tsc"
			],
			"group": "build",
			"label": "tsc: 构建 - tsconfig.json"
		}
	]
}
再次按下 F5,仍可能出现上述错误。此时需选择“添加配置”,系统将创建 launch.json 文件:
{
    "version": "0.2.0",
    "configurations": [
        {
            "type": "node",
            "request": "launch",
            "name": "启动程序",
            "skipFiles": [
                "<node_internals>/**"
            ],
            "program": "${workspaceFolder}\\helloworld.ts",
            "preLaunchTask": "tsc: build - tsconfig.json",
            "outFiles": [
                "${workspaceFolder}/out/**/*.js"
            ]
        }
    ]
}
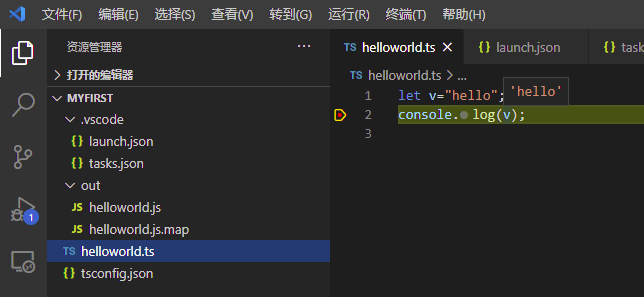
再次按下 F5 仍报错,检查发现生成的两个文件中任务名称不一致。将 task.json 中的“tsc: 构建 - tsconfig.json”修改为“tsc: build - tsconfig.json”,再次按 F5 运行即可成功。尝试添加断点,调试功能正常:
模块化
为了实现代码的模块化开发,我们将代码分割至独立文件中,以便分别开发与调试。通过显式声明引用,可避免全局变量和函数带来的混乱。此时需使用 export 声明可供其他模块使用的函数和变量,并在引用这些函数和变量的模块中使用 import 导入所需内容。我们创建新文件 myfunctions.ts,其中包含一个函数:
export function myName(){
    return "张三";
}
修改 helloworld.ts 以调用该函数:
import {myName} from './myfunctions'
let v="hello"+myName();
console.log(v);
使用Webpack打包客户端代码
前文内容主要针对服务端开发。对于客户端代码,我们希望实现:1)打包为独立 JS 文件以便发布;2)方便运行客户端程序;3)便于调试。此处我们将使用 Webpack 作为打包工具,在 VS Code 中构建 TypeScript 客户端项目骨架。
首先,为测试项目创建目录,在控制台进入该目录并运行 code . 启动 VS Code。在终端中执行 npm init 以创建项目的 package.json,内容如下:
{
  "name": "mydevnew",
  "version": "1.0.0",
  "description": "my new typescript project",
  "main": "index.js",
  "scripts": {
    "test": "echo \"Error: no test specified\" && exit 1"
  },
  "author": "",
  "license": "ISC"
}
随后,安装必要的程序包,在终端中执行以下命令:
npm install --save-dev webpack webpack-cli typescript ts-loader webpack-dev-server source-map-loader
接下来,添加 TypeScript 配置文件 tsconfig.json:
{
    "compilerOptions": {
        "module": "es6",
        "target": "es5",
        "sourceMap": true,
        "declaration": true,
        "declarationDir": "./dist/typing",
        "lib": [
            "webworker",
            "es6",
            "es5",
            "dom"
          ]
    },

    "exclude": [
        "node_moudles",
        "dist"
    ]
}
同时还需要添加 webpack.config.js 配置文件:
const path = require('path');
module.exports = {
    mode: 'development',
    entry: './src/main.ts',//入口文件
    output: {
        filename: 'main.js',//编译出来的文件名
        path: path.resolve(__dirname, 'dist'),//编译文件所在目录
        publicPath: '/dist/',//静态资源目录,可以设为“编译文件所在目录”, 代码自动编译,网页自动刷新
    },
    module: {
        rules: [
            {
                // For our normal typescript
                test: /\.ts?$/,
                use: [
                    {
                        loader: 'ts-loader'
                    }
                ],
                exclude: /(?:node_modules)/,
            },
        ]
    },
    resolve: {
        modules: [
            'src',
            'node_modules'
        ],
        extensions: [
            '.js',
            '.ts'
        ]
    },
    devServer: {
        static: {
            directory: path.join(__dirname, ''),
          },
        hot: true,
        compress: true,
        host: 'localhost',
        port: 8888
  },
  devtool:'source-map',
 };
修改 package.json,在 scripts 字段中增加构建命令:
    "build": "webpack",
    "dev": "webpack-dev-server",
至此,环境配置基本完成,可以开始编写代码。创建 src 目录用于保存源代码,并在 src 中创建 main.ts 和 hello.ts,代码如下:
import {myName} from "hello"
console.log("TypeScript测试项目");
console.log(myName());
document.body.innerHTML="你好!"+myName();
hello.ts 作为一个小型模块:
export function myName(){
    return "张三";
}
在根目录创建一个引导页面 index.html:
<!DOCTYPE html>
<html lang="en">

<head>
    <meta charset="UTF-8">
    <title>TypeScript测试项目</title>
</head>

<body>
    <script src="dist/main.js"></script>
</body>

</html>
此时,我们可以在终端中运行 npm run dev 以启动 Webpack 的 Web Server。在浏览器中输入 http://localhost:8888,即可看到程序已成功运行:
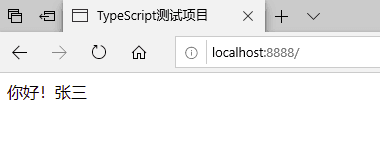
若仅需编译代码,可运行 npm run build,生成的 JS 文件将保存在 dist 目录中,index.html 作为引导页面。
至此,关于 VS Code 开发 TypeScript 的实现步骤介绍完毕。如需了解更多相关 VS Code 开发 TypeScript 的内容,请搜索本站以前的文章或继续浏览下面的相关文章,希望大家以后多多支持本站!