

本文详解如何使用JavaScript实现图片放大镜效果。通过监听鼠标移动事件获取坐标,计算放大镜在缩略图中的相对位置,并依据比例关系同步移动大图。文章涵盖HTML/CSS结构搭建、鼠标跟随逻辑、边界限制处理及大图联动算法,提供完整代码示例,帮助开发者掌握前端交互特效的核心实现方法。
放大镜特效功能概述
我们需要实现的功能是:当鼠标悬停在缩略图上时,缩略图上方会出现一个跟随鼠标的半透明遮罩块,该遮罩块所覆盖的区域将以放大的形式显示在右侧的大图中。
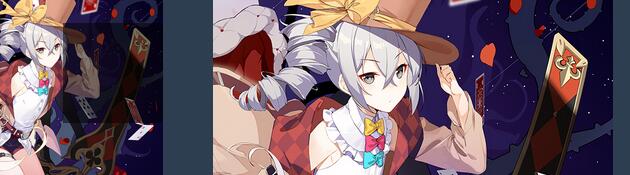
实现此效果主要依赖以下属性与方法:鼠标坐标(e.clientX、e.clientY)、元素偏移量(offsetLeft、offsetTop)以及元素的宽高(offsetWidth、offsetHeight)。
HTML与CSS结构实现
HTML与CSS结构代码如下:
<!DOCTYPE html>
<html lang="en">
<head>
    <meta charset="UTF-8">
    <meta name="viewport" content="width=device-width, initial-scale=1.0">
    <title>Document</title>
    <style>
        *{
            margin: 0;
            padding: 0;
        }
        body{
            background:#2c3e50;

        }
        .wrap{
            display: flex;
            position: relative;
            left: 200px;
            top: 30px;
        }
        .small{
            width: 500px;
            height: 300px;
            border-radius: 20px;
            overflow: hidden;
            position: relative;
            left: 0px;
        }
        .small img{
            width: 100%;
            height: 100%;
        }
        .small span{
            display: none;
            position: absolute;
            left: 0;
            top: 0;
            width: 100px;
            height: 100px;
            background: rgba(0,0,0,0.5);
            cursor: pointer;
            z-index: 1;
        }
        .big{
            display: none;
            width: 400px;
            height: 400px;
            overflow: hidden;
            position: relative;
            left: 50px;
            top: 0;
        }
        .big img{
            position: absolute;
            left: 0;
            top: 0;
            width: 1000px;
            height: 600px;
        }
    </style>
</head>
<body>
    <div class="wrap">
        <div class="small">
            <img src="img/33.jpg" alt="">
            <span></span>
        </div>
        <div class="big">
            <img src="img/33.jpg" alt="">
        </div>
    </div>

</body>
</html>
JavaScript核心逻辑
JavaScript逻辑部分如下:
鼠标移入与显示控制
首先处理鼠标移入事件:当鼠标进入缩略图区域时,显示放大镜遮罩块,并同时显示右侧的大图容器。
//最大的容器
let wrap=document.querySelector('.wrap');
//小图部分
let smallWrap=document.querySelector('.wrap .small');
let smallImg=document.querySelector('.wrap .small img');
let smallBox=document.querySelector('.wrap .small span');
//大图部分
let bigBox=document.querySelector('.wrap .big');
let bigImg=document.querySelector('.wrap .big img');
smallWrap.onmouseover=function(){
       smallBox.style.display="block";
       bigBox.style.display="block";
}
鼠标跟随与坐标计算
当鼠标在缩略图上移动时,需让放大镜遮罩块跟随鼠标移动。这里利用event对象的clientX和clientY属性获取鼠标在页面中的绝对坐标。
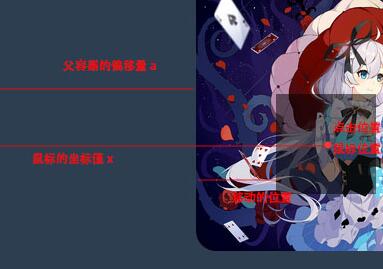
通过clientX和clientY获取鼠标位置后,需结合父容器的偏移量以及放大镜自身的尺寸进行计算。在实际项目中,若放大镜容器存在额外偏移,需减去该偏移量以消除影响。由于放大镜效果要求鼠标始终位于遮罩块的中心,因此只需计算遮罩块的移动距离即可确定其位置。
smallWrap.onmousemove=function(e){
            let moveX=e.clientX-wrap.offsetLeft-smallWrap.offsetLeft-smallBox.offsetWidth/2;
            let moveY=e.clientY-wrap.offsetTop-smallWrap.offsetTop-smallBox.offsetHeight/2;

            let maxX=smallWrap.offsetWidth-smallBox.offsetWidth;
            let maxY=smallWrap.offsetHeight-smallBox.offsetHeight;


            smallBox.style.left=moveX+'px'
            smallBox.style.top=moveY+'px'

       }
放大镜边界限制
至此,放大镜已能跟随鼠标移动。但还需添加边界限制,防止放大镜移出缩略图范围。
边界限制逻辑如下:
smallWrap.onmousemove=function(e){
            let moveX=e.clientX-wrap.offsetLeft-smallWrap.offsetLeft-smallBox.offsetWidth/2;
            let moveY=e.clientY-wrap.offsetTop-smallWrap.offsetTop-smallBox.offsetHeight/2;

            let maxX=smallWrap.offsetWidth-smallBox.offsetWidth;
            let maxY=smallWrap.offsetHeight-smallBox.offsetHeight;


            //范围限定方法一
           /*  if(moveX<0){
                moveX=0;
            }else if(moveX>=maxX){
                moveX=maxX
            }
            if(moveY<0){
                moveY=0;
            }else if(moveY>=maxY){
                moveY=maxY
            } */
             //范围限定方法二
            moveX=Math.min(maxX,Math.max(0,moveX))
            moveY=Math.min(maxY,Math.max(0,moveY))

            smallBox.style.left=moveX+'px'
            smallBox.style.top=moveY+'px'

       }
大图联动移动算法
实现放大镜跟随后,需进一步实现大图的联动移动。大图移动方向与放大镜相反,且移动距离与放大镜移动距离成正比。具体而言,缩略图宽度与大图总宽度的比例,等于放大镜最大移动距离与大图最大移动距离的比例。利用这一比例关系,可计算出大图应移动的像素值。
若仅使用“放大镜移动距离/缩略图宽度 = 大图移动距离/大图宽度”这一公式,虽能实现联动,但缺乏边界限制,可能导致大图显示异常。
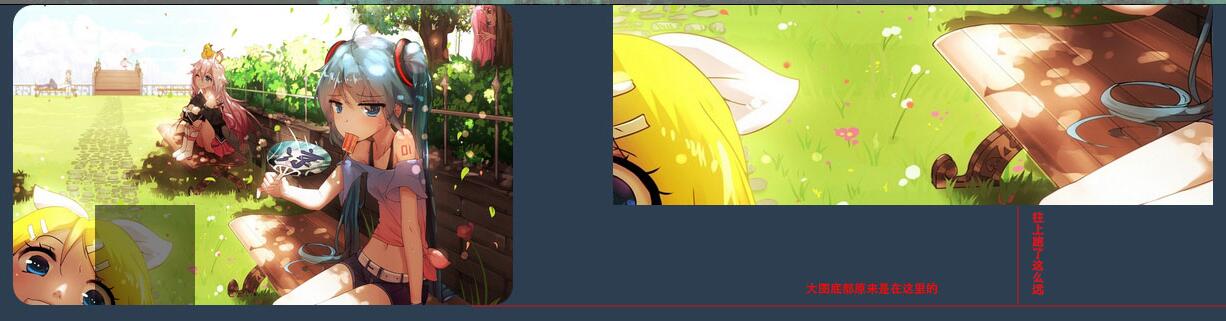
因此,公式应修正为:放大镜移动距离 / (缩略图宽度 - 放大镜宽度)。其中,(缩略图宽度 - 放大镜宽度)代表放大镜的最大有效移动范围。
最终计算公式为:放大镜移动距离 / (缩略图宽度 - 放大镜宽度) = 大图移动距离 / (大图总高度 - 大图显示区域高度)。
需注意,大图在容器内的移动方向与放大镜的移动方向是相反的。
smallWrap.onmousemove=function(e){
            let moveX=e.clientX-wrap.offsetLeft-smallWrap.offsetLeft-smallBox.offsetWidth/2;
            let moveY=e.clientY-wrap.offsetTop-smallWrap.offsetTop-smallBox.offsetHeight/2;

            let maxX=smallWrap.offsetWidth-smallBox.offsetWidth;
            let maxY=smallWrap.offsetHeight-smallBox.offsetHeight;


            //范围限定方法一
           /*  if(moveX<0){
                moveX=0;
            }else if(moveX>=maxX){
                moveX=maxX
            }
            if(moveY<0){
                moveY=0;
            }else if(moveY>=maxY){
                moveY=maxY
            } */
             //范围限定方法二
            moveX=Math.min(maxX,Math.max(0,moveX))
            moveY=Math.min(maxY,Math.max(0,moveY))

            smallBox.style.left=moveX+'px'
            smallBox.style.top=moveY+'px'

            let left=moveX/(smallImg.offsetWidth-smallBox.offsetWidth);//smallImg.offsetWidth-smallBox.offsetWidth最大移动位置
            let top=moveY/(smallImg.offsetHeight-smallBox.offsetHeight);

            bigImg.style.left=-left*(bigImg.offsetWidth-bigBox.offsetWidth)+'px'
            bigImg.style.top=-top*(bigImg.offsetHeight-bigBox.offsetHeight)+'px'
       }
鼠标移出与隐藏处理
最后,添加鼠标移出事件:当鼠标离开缩略图区域时,隐藏放大镜遮罩块和大图容器。
smallWrap.onmouseout=function(){
            smallBox.style.display="none";
            bigBox.style.display="none";
       }
完整代码如下:
<!DOCTYPE html>
<html lang="en">
<head>
    <meta charset="UTF-8">
    <meta name="viewport" content="width=device-width, initial-scale=1.0">
    <title>Document</title>
    <style>
        *{
            margin: 0;
            padding: 0;
        }
        body{
            background:#2c3e50;

        }
        .wrap{
            display: flex;
            position: relative;
            left: 200px;
            top: 30px;
        }
        .small{
            width: 500px;
            height: 300px;
            border-radius: 20px;
            overflow: hidden;
            position: relative;
            left: 100px;
        }
        .small img{
            width: 100%;
            height: 100%;
        }
        .small span{
            display: none;
            position: absolute;
            left: 0;
            top: 0;
            width: 100px;
            height: 100px;
            background: rgba(0,0,0,0.5);
            cursor: pointer;
            z-index: 1;
        }
        .big{
            display: none;
            width: 400px;
            height: 400px;
            overflow: hidden;
            position: relative;
            left: 120px;
            top: 0;
        }
        .big img{
            position: absolute;
            left: 0;
            top: 0;
            width: 1000px;
            height: 600px;
        }
    </style>
</head>
<body>
    <div class="wrap">
        <div class="small">
            <img src="img/33.jpg" alt="">
            <span></span>
        </div>
        <div class="big">
            <img src="img/33.jpg" alt="">
        </div>
    </div>
    <script>
        //最大的容器
       let wrap=document.querySelector('.wrap');
       //小图部分
       let smallWrap=document.querySelector('.wrap .small');
       let smallImg=document.querySelector('.wrap .small img');
       let smallBox=document.querySelector('.wrap .small span');
        //大图部分
       let bigBox=document.querySelector('.wrap .big');
       let bigImg=document.querySelector('.wrap .big img');
       smallWrap.onmouseover=function(){
            smallBox.style.display="block";
            bigBox.style.display="block";
       }
       smallWrap.onmousemove=function(e){
            let moveX=e.clientX-wrap.offsetLeft-smallWrap.offsetLeft-smallBox.offsetWidth/2;
            let moveY=e.clientY-wrap.offsetTop-smallWrap.offsetTop-smallBox.offsetHeight/2;

            let maxX=smallWrap.offsetWidth-smallBox.offsetWidth;
            let maxY=smallWrap.offsetHeight-smallBox.offsetHeight;


            //范围限定方法一
           /*  if(moveX<0){
                moveX=0;
            }else if(moveX>=maxX){
                moveX=maxX
            }
            if(moveY<0){
                moveY=0;
            }else if(moveY>=maxY){
                moveY=maxY
            } */
             //范围限定方法二
            moveX=Math.min(maxX,Math.max(0,moveX))
            moveY=Math.min(maxY,Math.max(0,moveY))

            smallBox.style.left=moveX+'px'
            smallBox.style.top=moveY+'px'

            let left=moveX/(smallImg.offsetWidth-smallBox.offsetWidth);//smallImg.offsetWidth-smallBox.offsetWidth最大移动位置
            let top=moveY/(smallImg.offsetHeight-smallBox.offsetHeight);

            bigImg.style.left=-left*(bigImg.offsetWidth-bigBox.offsetWidth)+'px'
            bigImg.style.top=-top*(bigImg.offsetHeight-bigBox.offsetHeight)+'px'
       }
       smallWrap.onmouseout=function(){
            smallBox.style.display="none";
            bigBox.style.display="none";
       }
    </script>
</body>
</html>
以上为本文的全部内容,希望对您的学习有所帮助,欢迎继续支持本站。