

本文介绍如何使用JavaScript实现一个简单的进度条效果。通过获取元素宽度,结合定时器动态改变内部div的宽度值,并在按钮点击事件中触发更新,最终实现进度条的动画展示。
JavaScript实现进度条效果
本文分享了一个使用JavaScript实现进度条效果的具体代码示例,供读者参考。
运行效果如图所示。
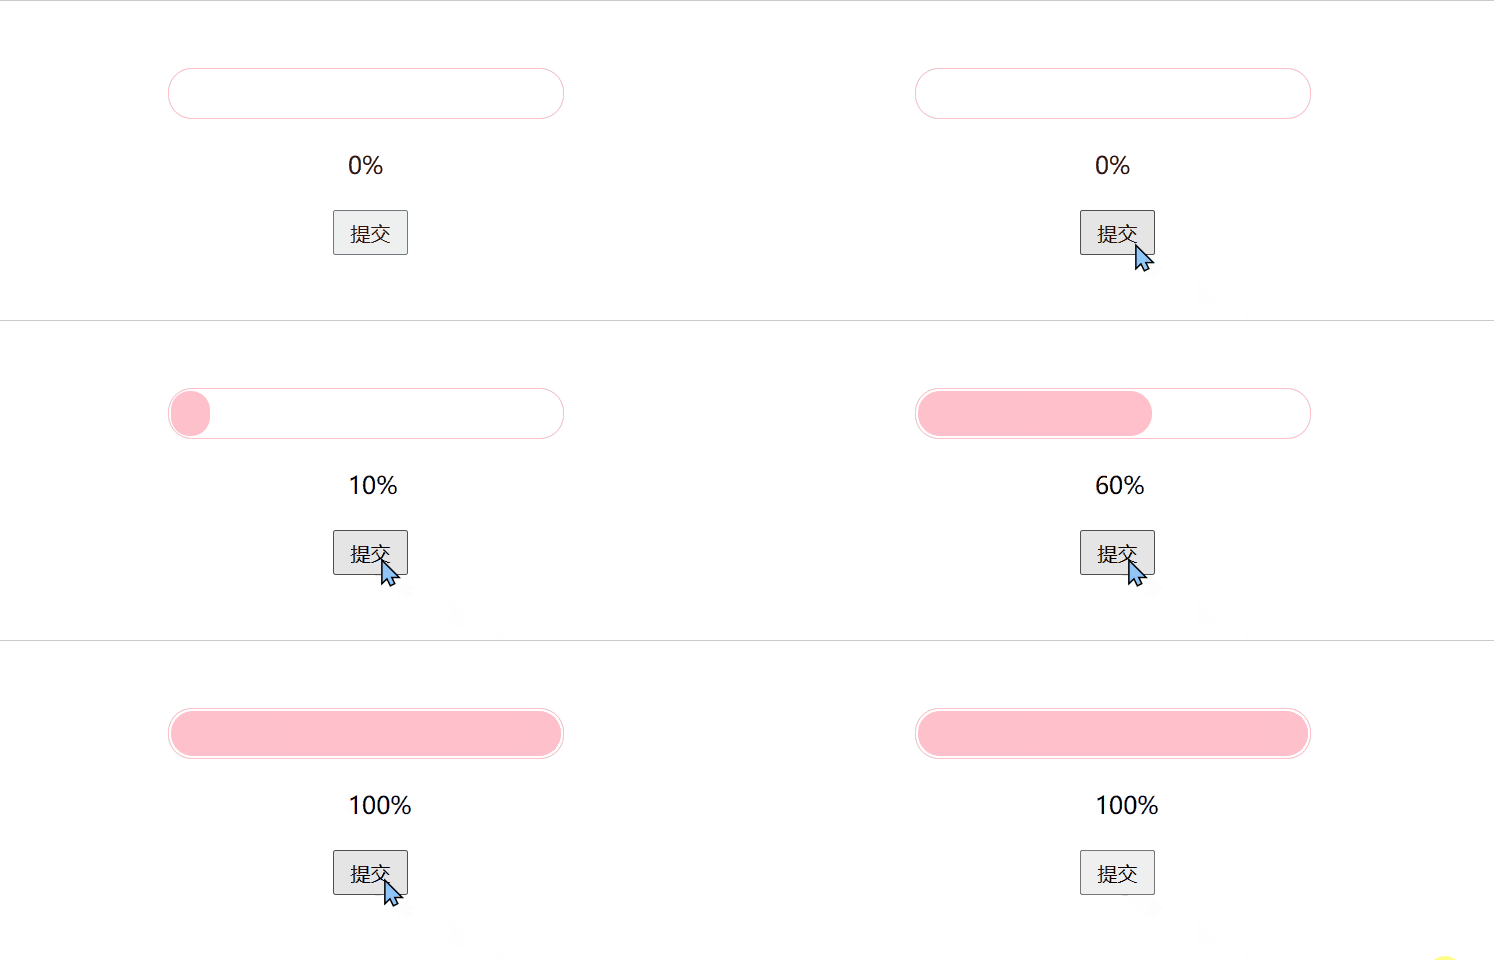
该案例实现并不复杂,在练习过程中,关键的新知识点是利用window.getComputedStyle()函数来获取元素的宽度值。
整体思路是:在一个外层div容器中,初始放置一个宽度为0的内层div。随后,在按钮的onclick回调函数中,使用定时器不断改变该内层div的宽度值。
具体代码如下:
<!DOCTYPE html>
<html lang="en">

<head>
    <meta charset="UTF-8">
    <meta http-equiv="X-UA-Compatible" content="IE=edge">
    <meta name="viewport" content="width=device-width, initial-scale=1.0">
    <title>Document</title>
    <style>
        #container {
            width: 500px;
            height: 200px;
            margin: 50px auto;
            position: relative;
        }

        #box {
            width: 260px;
            height: 30px;
            border: 1px pink solid;
            border-radius: 16px;
            margin-bottom: 20px;
            padding: 1px;
            overflow: hidden;
        }

        #cont {
            width: 0;
            height: 100%;
            background-color: pink;
            border-radius: 16px;
        }

        #btn {
            position: absolute;
            margin-left: 110px;
            width: 50px;
            height: 30px;
        }


        #text {
            display: block;
            position: relative;
            left: 120px;
            margin-bottom: 20px;
        }

    </style>
</head>

<body>
    <div id="container">
        <div id="box" data-content-before="22">
            <div id="cont"></div>
        </div>
        <div id="text">0%</div>
        <button id="btn">提交</button>
    </div>
    <script>
        let box = document.getElementById("box");
        let btn = document.getElementById("btn");
        let cont = document.getElementById("cont");
        let text = document.getElementById("text");

        function getstyle(obj, name) {
            if (window.getComputedStyle) {
                return window.getComputedStyle(obj, null)[name];
            }
            else {
                return obj.currentStyle[name];
            }
        }

        btn.onclick = function () {
            let ini = 0;
            let num = setInterval(() => {

                let tem = parseInt(window.getComputedStyle(cont, null)["width"]);
                let now = tem + 26;

                if (tem >= 260) {
                    console.log(now);
                    clearInterval(num);
                    return;
                }

                cont.style.width = now + "px";
                ini = ini + 10;
                text.innerText = ini + "%";

            }, 80);
        }
    </script>

</body>

</html>
以上就是本文的全部内容,希望对大家的学习有所帮助,也希望大家多多支持本站。