

本文介绍如何使用JavaScript和Canvas API绘制带箭头的坐标轴及折线。通过定义边距、箭头尺寸及顶点坐标,计算并绘制X/Y轴,最后遍历数据点数组绘制连线。包含完整的HTML结构与JS逻辑,适合前端开发参考。
Canvas绘制坐标轴与线条实现
本文分享了利用JavaScript结合Canvas元素绘制坐标轴及线条的具体实现方案,供开发者参考。
具体实现代码如下:
<!DOCTYPE html>
<html lang="en">
<head>
    <meta charset="UTF-8">
    <title>在指定位置画多个点</title>
    <style>
        canvas{
            border: 1px dashed gray;
        }
    </style>
</head>
<body>
    <canvas id="cvs" width="500" height="500"></canvas>
</body>
</html>
JavaScript核心逻辑如下:
<script>
    var cvs = document.getElementById('cvs');
    var ctx = cvs.getContext('2d');

    // 坐标轴距离画布上右下左的边距
    var padding = {
        top:20,
        right:20,
        bottom:20,
        left:20
    }
    // 坐标轴中箭头的宽和高
    var arrow = {
        width:12,
        height:20
    }
    // 求坐标轴上顶点的坐标
    var vertexTop = {
        x:padding.left,
        y:padding.top
    }
    // 求坐标轴原点的坐标
    var origin = {
        x:padding.left,
        y:cvs.height - padding.bottom
    }
    // 求坐标轴右顶点的坐标
    var vertexRight = {
        x:cvs.width - padding.left,
        y:cvs.height - padding.bottom
    }

    //设置线宽
    ctx.lineWidth = 2;
    //画坐标轴的两条线
    ctx.beginPath();
    ctx.moveTo(vertexTop.x,vertexTop.y);
    ctx.lineTo(origin.x,origin.y);
    ctx.lineTo(vertexRight.x,vertexRight.y);
    ctx.stroke();

    //如何画箭头
    //画顶上箭头
    // ^
    // |
    // |
    ctx.beginPath();
    ctx.moveTo(vertexTop.x,vertexTop.y);
    ctx.lineTo(vertexTop.x - arrow.width/2,vertexTop.y + arrow.height);
    ctx.lineTo(vertexTop.x,vertexTop.y + arrow.height/2);
    ctx.lineTo(vertexTop.x + arrow.width/2,vertexTop.y + arrow.height);
    ctx.fill();

    //画右边的箭头
    // --->
    ctx.beginPath();
    ctx.moveTo(vertexRight.x,vertexRight.y);
    ctx.lineTo(vertexRight.x - arrow.height,vertexRight.y - arrow.width);
    ctx.lineTo(vertexRight.x - arrow.height/2,vertexRight.y);
    ctx.lineTo(vertexRight.x - arrow.height,vertexRight.y + arrow.width);
    ctx.fill();

    /*
     * 在坐标轴中指定位置画点,坐标算法:
     * 点的x轴:原点x坐标 + 点到原点的水平距离
     * 点的y轴:原点y坐标 - 点到原点的垂直距离
     */
    //定义点的坐标
    var points = [[10,10],[50,50],[90,90],[130,130],[170,170],[200,200]];
    //在坐标中画点 使用循环遍历数组中的坐标
    //设置颜色
    ctx.fillStyle = "green";
    points.forEach(function(arr){
        ctx.fillRect(origin.x + arr[0],origin.y - arr[1],5,5);
    });
    //根据点连线
    //防止重绘
    ctx.beginPath();
    ctx.lineWidth = 2;
    ctx.strokeStyle = "yellow";
    points.forEach(function (arr) {
        ctx.lineTo(origin.x + arr[0] + 1.8,origin.y - arr[1] + 1.8);
    });
    //描边
    ctx.stroke();
</script>
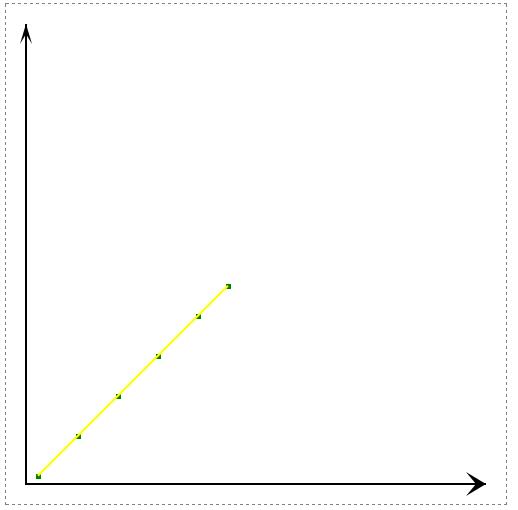
运行效果如下图所示:
以上就是本文的全部内容,希望对大家的学习有所帮助,也希望大家多多支持本站。